The Texas Records Exchange (TREx) & HISD Connect Training Counseling


64 Slides3.65 MB
The Texas Records Exchange (TREx) & HISD Connect Training Counseling and Compliance Department Student Records Department Cynthia Nemons, Manager Chris Roberson, Student Records Specialist HOUSTON INDEPENDENT SCHOOL DISTRICT HOUSTON INDEPENDENT SCHOOL DISTRICT
Objectives To supplement the TEA online training modules To successfully complete the training assessment STUDENT RECORDS DEPARTMENT 2
Training Agenda Introduction Part I-Access to the Appropriate Programs Part II-Create a Folder on your desktop for TREx Part III-Processing Items Requiring Attention – Generating the Student Extract – Adding Attachments STUDENT RECORDS DEPARTMENT 3
Introduction TREx Overview TEAL and TREx STUDENT RECORDS DEPARTMENT 4
TREx Overview Texas Records Exchange is the name selected for the electronic student record system required by House Bill 1 passed by the 3rd special session of the 79th Texas legislature. TEC 7.010 requires that education records be sent electronically within 10 working days of request by a district in which the student has enrolled, including information on course completion, teachers, special ed, IEP, and personal graduation plans. STUDENT RECORDS DEPARTMENT 5
TREx Overview School Registrars and those with a TREx role can use TREx to send and receive student records and transcripts from one school to another. High School Registrars are able to use TREx to send transcripts to institutes of higher education who subscribe to the UT SPEEDE server. STUDENT RECORDS DEPARTMENT 6
Part I Access to the Appropriate Programs Student Records Department 7
Access to Appropriate Programs HISD Connect SMS – Approved role – Elementary & Middle – TREx – High Schools – High School Registrar – Complete the HISD SIS Form TEAL (TEA Login) – Campus Registrar Role – Complete Online TREx Tutorials TREx Student Records Department 8
HISD Connect Complete the new HISD Connect SIS Form Fax completed SIS Security Request Form to Student Records (713) 556-6751. If you are changing schools, please include your TEAL Username. Example Marie.Jones4 Call 713-556-6744 with questions. Student Records Department 9
TEAL Complete 8 TEAL Tutorial Modules. Apply for TEAL account at https://pryor.tea.state.tx.us/. Student Records Department 10
TREx Access Access Instructions – TEAL/TREx Access Instructions Fax the Principal-signed application access form to 713-556-6751 Apply on line (TEA Website) TEA Emails Username and Password Student Records Department 11
Part II Create a folder on your desktop for TREx (stay organized ) Student Records Department 12
Part II Processing All Items Requiring Attention Student Records Department 13
Fulfilling a TREx Records Request Generate an extract for all requests. Open HISD Connect where HISD stores student records. Run the extract in HISD Connect to remove a copy of the record. Save the extract file to the TREx folder on the desktop. Keep HISD Connect open. Login and use TREx to upload the file from the desktop or the folder where you saved it. Send the record through TREx. Student Records Department 14
Part III Generating the Student Extract Student Records Department 15
TREx All items requiring attention should have a zero by the link Student Records Department 16
TREx DETAILS, DETAILS, DETAILS It is important to click on the DETAILS link to determine what the requesting school is requiring. Student Records Department 17
TREx After determining the details, you are now ready to process the extract in HISD Connect. Student Records Department 18
Step 1: Generate Extract On the Start Page, click State Report s Student Records Department 19
Step 2: Select TREX Extract by Student Number If you are not a high school registrar, go to Actions, Switch Ro Student Records Department 20
Step 3: Clearing Defaults NOTE: The clear all setting allows the user to clear the default boxes previously used. Click on District Set Up. Student Records Department 21
Step 4: Student Selection Enter the student number for up to 10 students Click on Generate Extract Student Records Department 22
Step 5: Student Selection Information 1.Select Student Contacts as the Source for Contacts 2.Verify the Current Academic School Year is selected 3.Determine which Historical Grades to include 4.Select the Grade Type Determine if SAT/ACT should be included 5.Determine if EOC Assessment Waivers should be included 6.Specify which grades represent Incomplete, leave blank if the default I is used, separate grades with a comma if more than one grade represents an incomplete. Click on TREX NEW Student Records Department 23
1. Step 6: Student Selection Information 1.Select Graduates only from the Use Calculated Class Rank Fields from Class Rank Tab 2.Select No for Exclude Class Rank 3.Select Weighted for Class Rank/GPA Method 4.Select No for Use GPA Override 5.Select No for Use Class Rank Overrides 6.Leave the Class Rank Date blank All Students for ES and MS Student Records Department 24
Step 7: When to Generate Extract Run Now Student Records Department 25
Step 8: When to Generate Extract Schedule for later. Student Records Department 26
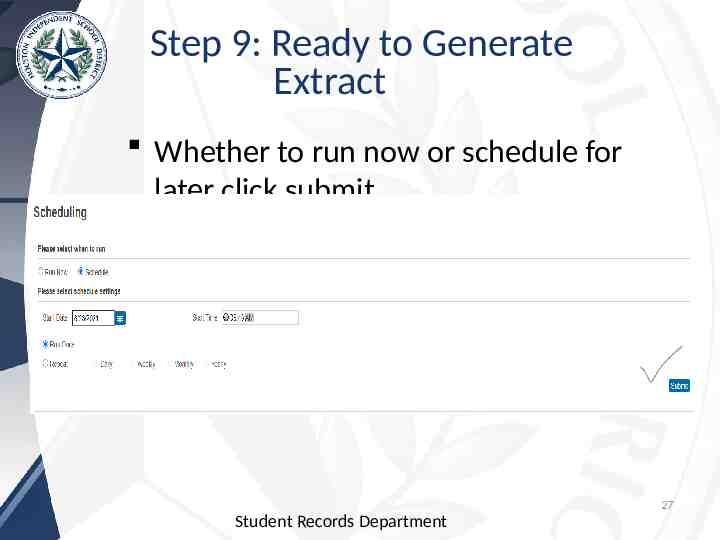
Step 9: Ready to Generate Extract Whether to run now or schedule for later click submit. 27 Student Records Department
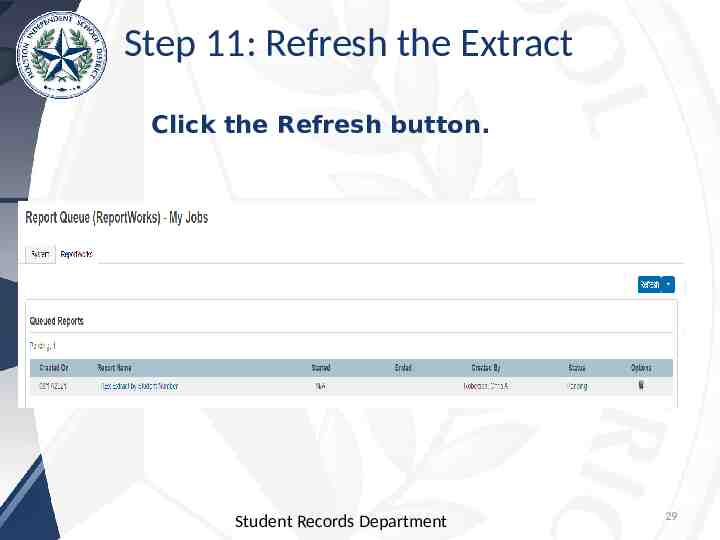
Step 10: Running the Extract On Submit of the TREx by Student Number page, the Report Queue (ReportWorks) – My Jobs will display Student Records Department 28
Step 11: Refresh the Extract Click the Refresh button. Student Records Department 29
Step 12: Waiting on the Completed Status. TREx Extract is ready!! 1. When the report moves from the Queued Reports area to the Completed area of the Report Queue page, click the word Completed to download the zipped folder of TREx file. Student Records Department 30
Step 13: Click on the Zip File Student Records Department 31
Step 14: Zip File opens in new window Student Records Department 32
Step 15: Zip File opens in new window. The extracts are displayed. Create a TREx Folder under the OneDrive Header on the left side of your page Save the extract. Student Records Department 33
Step 16: Below is an example of the TREx extracts that will reside in the TREx Folder. Student Records Department 34
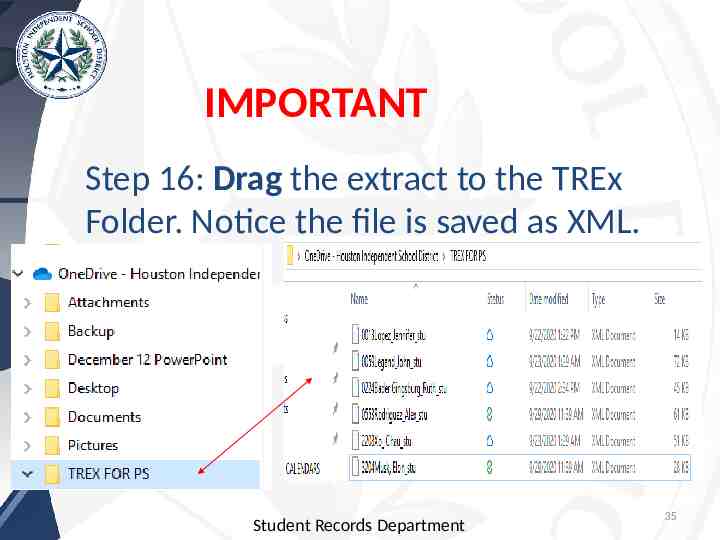
IMPORTANT Step 16: Drag the extract to the TREx Folder. Notice the file is saved as XML. Student Records Department 35
TEAL and TREx- Do Not use CHROME Enter TEA username and password 36
TEAL and TREx Campus Registrar link Student Records Department 37
Fulfilling TREx Request Access the link Inbound Request/ Transcript Any request greater than 0 requires attention Student Records Department 38
After the page updates, begin process the oldest request. Student Records Department 39
Fulfilling the Request After the screen uploads, select the oldest request and fulfill it and upload the HISD Connect extract Student Records Department 40
Click upload Student Records Department 41
Upload the PowerSchool extract from the TREx folder Select the Browse key and search for the PowerSchool extract Select Upload and the PowerSchool extract will upload Student Records Department 42
Step 13: Uploading a Data File Copyright 2007 Texas Education Agency Student Records Department 43
File is uploaded Student Records Department 44
Click Done Student Records Department 45
Note the green highlighted bar indicated an extract has successfully uploaded. Next. Copyright 2007 Texas Education Agency Student Records Department 46
Type a short message, click the acceptance square and hit send Student Records Department 47
Use the print button to keep a paper record of the transaction. Student Records Department 48
Part III Adding Attachments Student Records Department 49
Adding Attachments Generate the extract in HISD Connect Go to Manage Records/Transcripts in TREx Upload HISD Connect extract and view as a PDF Scan the attachments – Save with the correct naming convention – Save in the TREx folder on the desktop. Click Add Attachments on the line with the student record to complete the process Student Records Department 50
Adding Attachments via HISD Copier Scan the attachment(s) and email to yourself Open your email Save the attachments in the TREX folder using the naming convention (see upcoming slide) Upload the attachment - “add attachment” Student Records Department 51
Naming Conventions for Attachments ####LastName FirstName Descriptor## #### last 4 digits of the Student ID LastName student’s last name FirstName student’s first name Descriptor le (Limited English Proficiency (LEP) attachment) ## - two-digit generation number (01-99)* to allow for multiple attachments within type Student Records Department 52
Descriptors for Attachments le - Limited English Proficiency (LEP) attachment im - Immunization record attachment) gt - Gifted/Talented (GT) attachment, such as a GT profile ms - Miscellaneous record ot - Other – to be used for any document that the district is uncomfortable giving any indication of what is contained within the document tl - Transcript Legend Student Records Department 53
Numbers for Attachments ## - two-digit generation number (01-99)* to allow for multiple attachments within type *Note: Numbers 81-89 under ms (miscellaneous record) are strictly reserved for Disciplinary Action AttachmentsDisciplinary Action attachments. *Note: Numbers 91-99 under ms (miscellaneous record) are strictly reserved for Individual Education Plan (IEP) attachments. Student Records Department 54
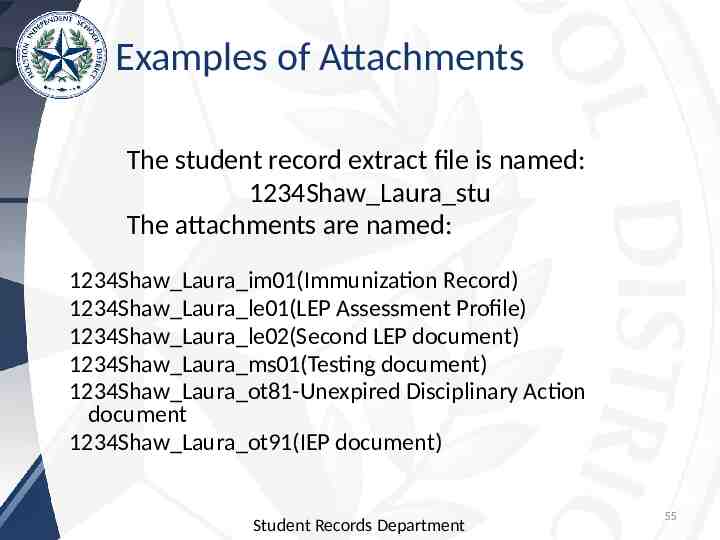
Examples of Attachments The student record extract file is named: 1234Shaw Laura stu The attachments are named: 1234Shaw Laura im01(Immunization Record) 1234Shaw Laura le01(LEP Assessment Profile) 1234Shaw Laura le02(Second LEP document) 1234Shaw Laura ms01(Testing document) 1234Shaw Laura ot81-Unexpired Disciplinary Action document 1234Shaw Laura ot91(IEP document) Student Records Department 55
Step 1: Locate the student record Copyright 2007 Texas Education Agency Student Records Department 56
Step 2: Click Add attachment A B A – Student record/transcripts that you accept and receive also can be found in the Manage Records location. If the record includes attachments, you can view or download them by selecting the Attachments link after you have accepted the record. B – Select the Add attachment link to add an attachment to a student’s record. Copyright 2007 Texas Education Agency Student Records Department 57
Step 3: Click Browse and complete the process A B D C A – select the Browse button to find an attachment. Navigate to the location of the file and select the Open button. B – After adding an attachment (A), TREx automatically prompts you to be able to add another attachment. C – Select the Upload button to finish the attachment upload process. D – Select the Cancel button to end the add attachment process without uploading the attachment file. Copyright 2007 Texas Education Agency Student Records Department 58
Step 4: Results A A –If the record includes attachments, you can view or download them by selecting the Attachments link after you have accepted the record. Copyright 2007 Texas Education Agency Student Records Department 59
Logout of TREx A A – Select the Logout link to end the TREx session. Copyright 2007 Texas Education Agency Student Records Department 60
TEA TREx Online Training Modules https://tea.texas.gov/reports-and-data/data-submission/texas-records-exch ange-trex/trex-training Kindly review the 8 modules to gain TREx instruction and guidance. Student Records Department 61
Confidentiality TREx files are copies of student records and must be protected at all times. Since each file includes a part of the student social security number and the name, be very careful to save files only on secure computers. Student Records Department 62
Access to TREx Contact Cynthia Nemons or Alicia Aguirre if there is a change in the persons authorized on the campus to send and receive records using TREx. If you leave a campus and move to another, you must get receive authorization for the new campus. Student Records Department 63
TREx Support and Training TEA TREx Training Website https://tea.texas.gov/reports-and-data/data-submission/texas-records-exch ange-trex/trex-training HISD Connect & TREx Assistance – Alicia Aguirre [email protected] – Iris Rodriguez [email protected] – Chris Roberson [email protected] – Cynthia Nemons [email protected] 64