REIMBURSEMENT METHODOLOGIES Revenue Cycle Management Also known as


36 Slides2.28 MB
REIMBURSEMENT METHODOLOGIES Revenue Cycle Management Also known as Accounts Receivable Management Week 3 Development resource obtained from www.cengage.com
Revenue Management Cycle Strong performing businesses will often use a CQI model (Continuous Quality Improvement). For a medical office this would mean tracking every step that a patient takes from the moment they have contact with the office and walk in the door to the moment they leave including all follow-up contacts and billing. The revenue cycle, or accounts receivable, management not only improves the financial outcome but can help to provide quality services to patients. The completion of each step, using caution to ensure accuracy, is very important.
Important Forms First, let’s look at the forms that you will be using both in the office setting and in this course
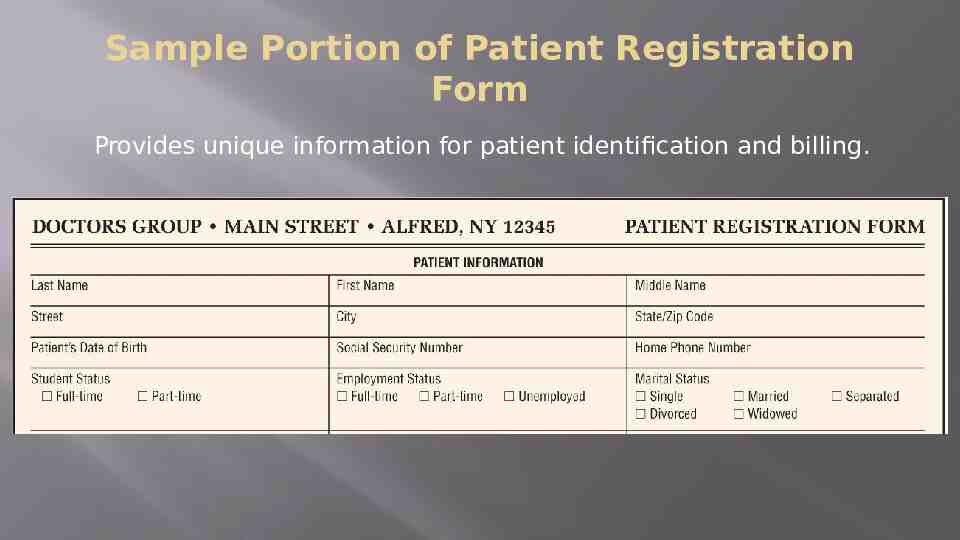
Sample Portion of Patient Registration Form Provides unique information for patient identification and billing.
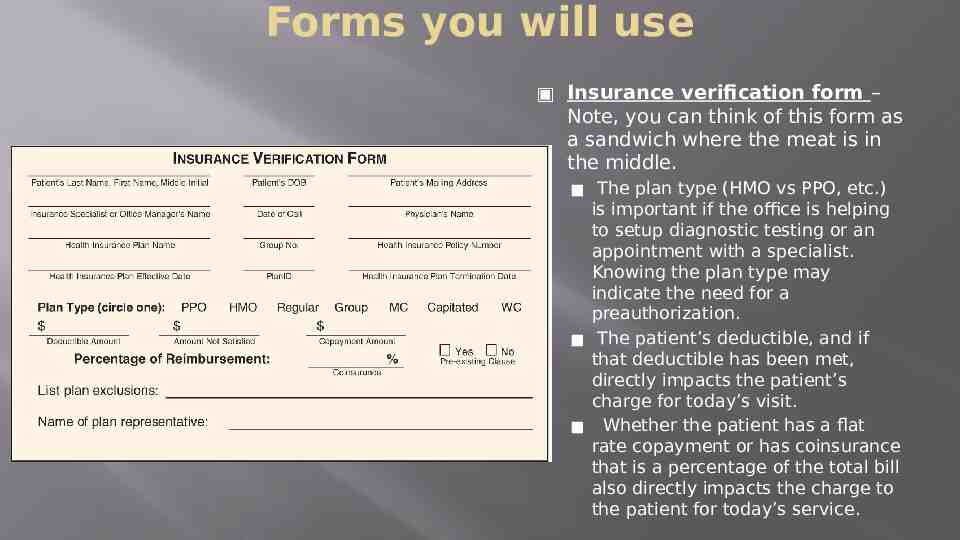
Forms you will use Insurance verification form – Note, you can think of this form as a sandwich where the meat is in the middle. The plan type (HMO vs PPO, etc.) is important if the office is helping to setup diagnostic testing or an appointment with a specialist. Knowing the plan type may indicate the need for a preauthorization. The patient’s deductible, and if that deductible has been met, directly impacts the patient’s charge for today’s visit. Whether the patient has a flat rate copayment or has coinsurance that is a percentage of the total bill also directly impacts the charge to the patient for today’s service.
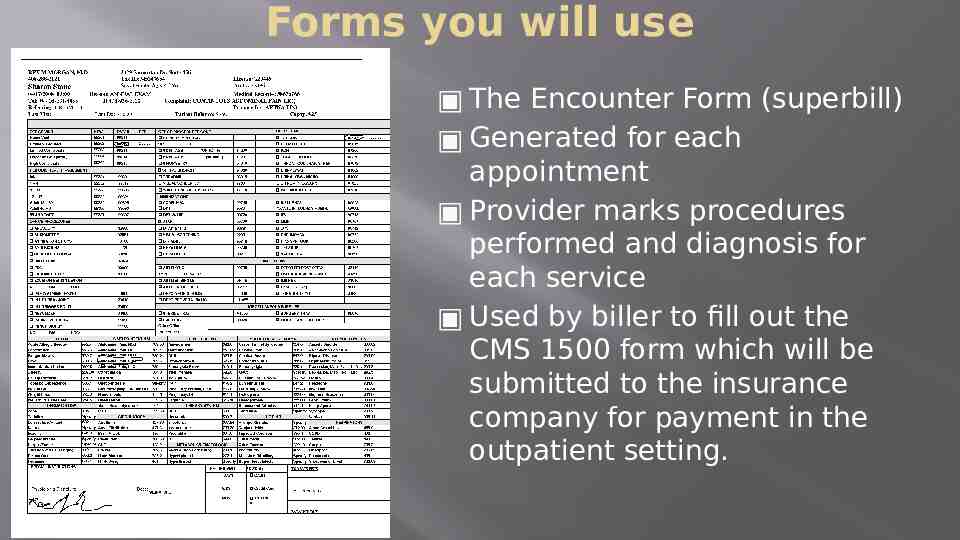
Forms you will use The Encounter Form (superbill) Generated for each appointment Provider marks procedures performed and diagnosis for each service Used by biller to fill out the CMS 1500 form which will be submitted to the insurance company for payment in the outpatient setting.
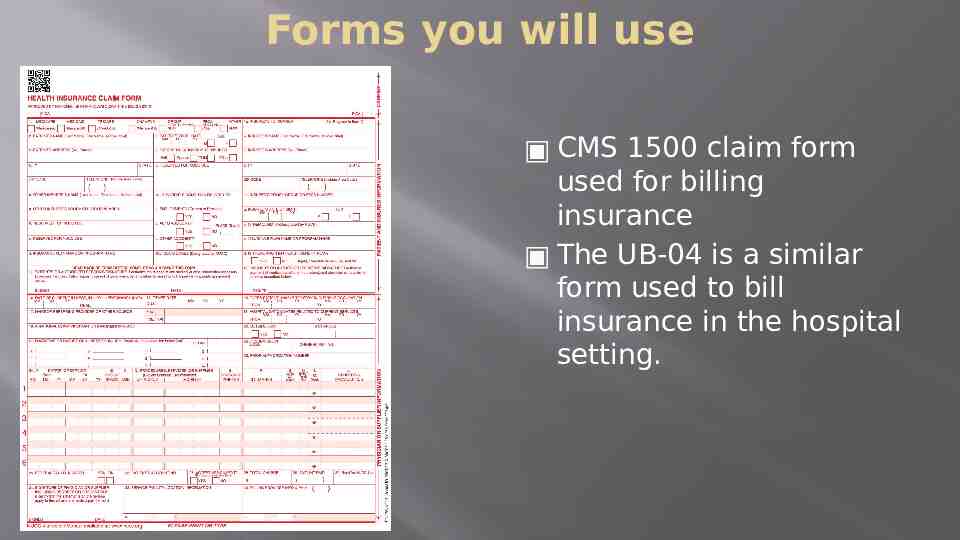
Forms you will use CMS 1500 claim form used for billing insurance The UB-04 is a similar form used to bill insurance in the hospital setting.
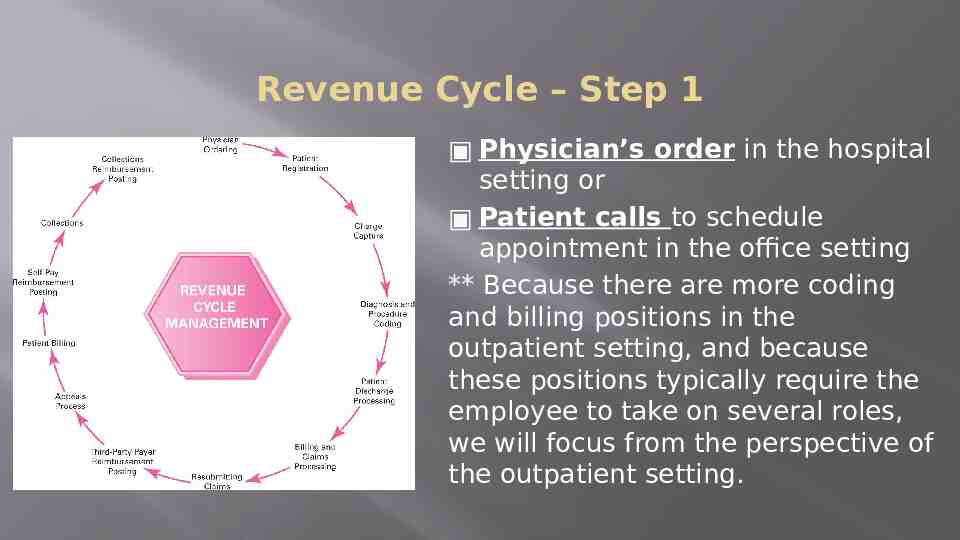
Revenue Cycle – Step 1 Physician’s order in the hospital setting or Patient calls to schedule appointment in the office setting ** Because there are more coding and billing positions in the outpatient setting, and because these positions typically require the employee to take on several roles, we will focus from the perspective of the outpatient setting.
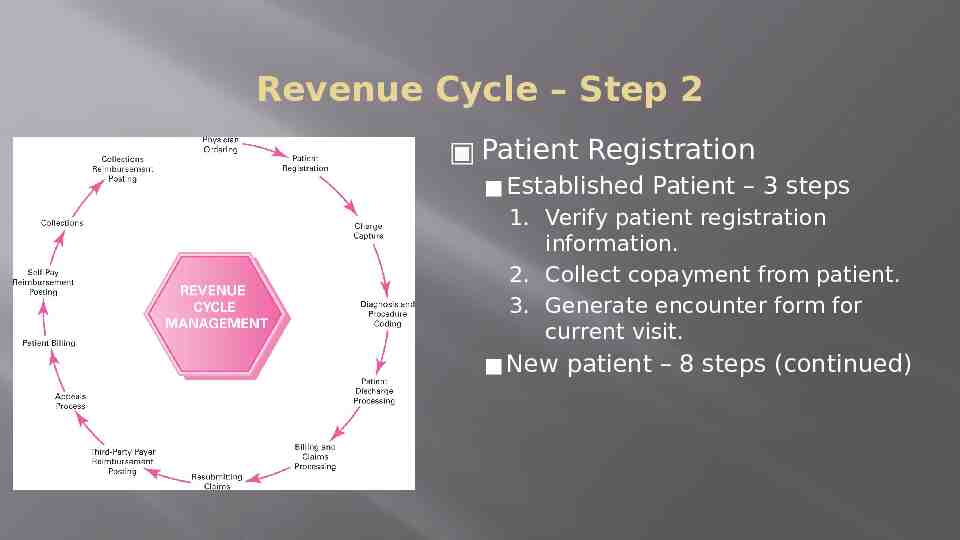
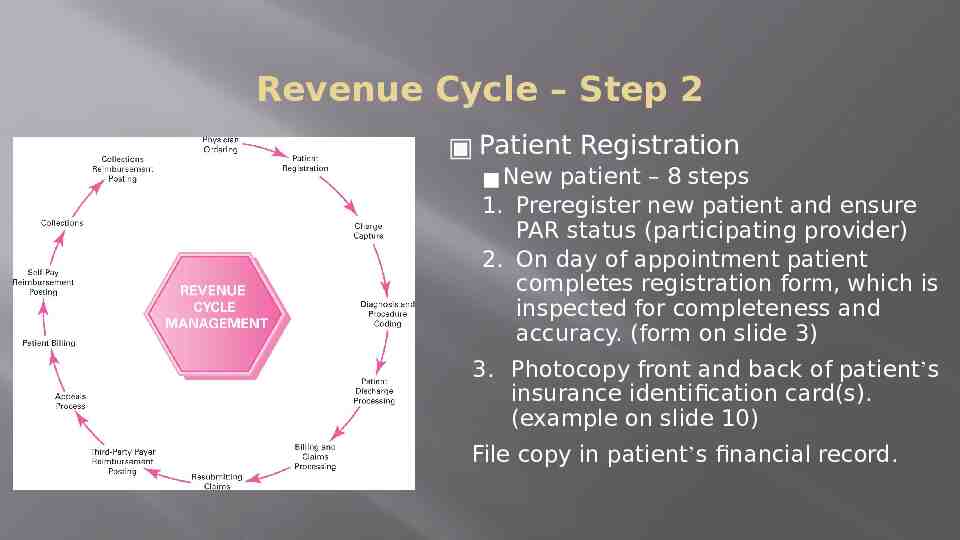
Revenue Cycle – Step 2 Patient Registration Established Patient – 3 steps 1. Verify patient registration information. 2. Collect copayment from patient. 3. Generate encounter form for current visit. New patient – 8 steps (continued)
Revenue Cycle – Step 2 Patient Registration New patient – 8 steps 1. Preregister new patient and ensure PAR status (participating provider) 2. On day of appointment patient completes registration form, which is inspected for completeness and accuracy. (form on slide 3) 3. Photocopy front and back of patient’s insurance identification card(s). (example on slide 10) File copy in patient’s financial record.
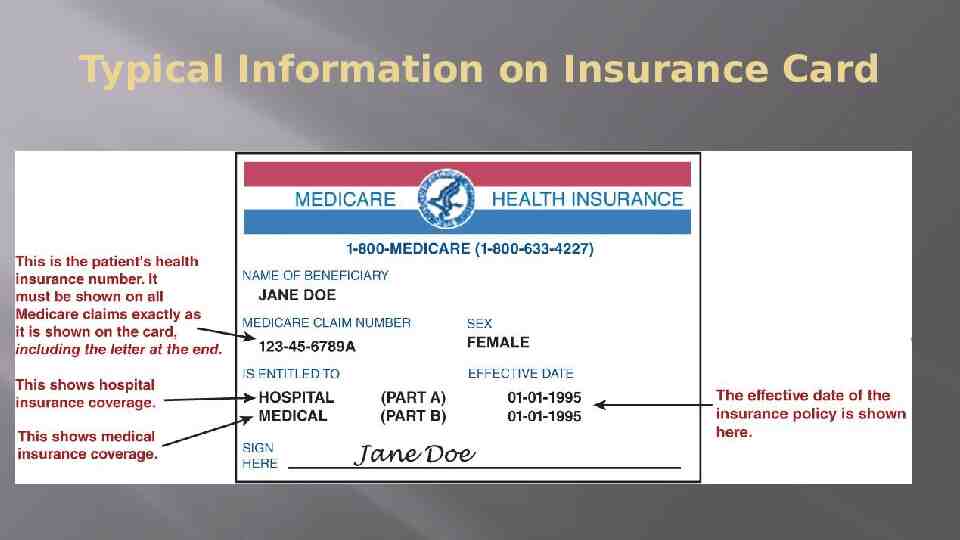
Typical Information on Insurance Card
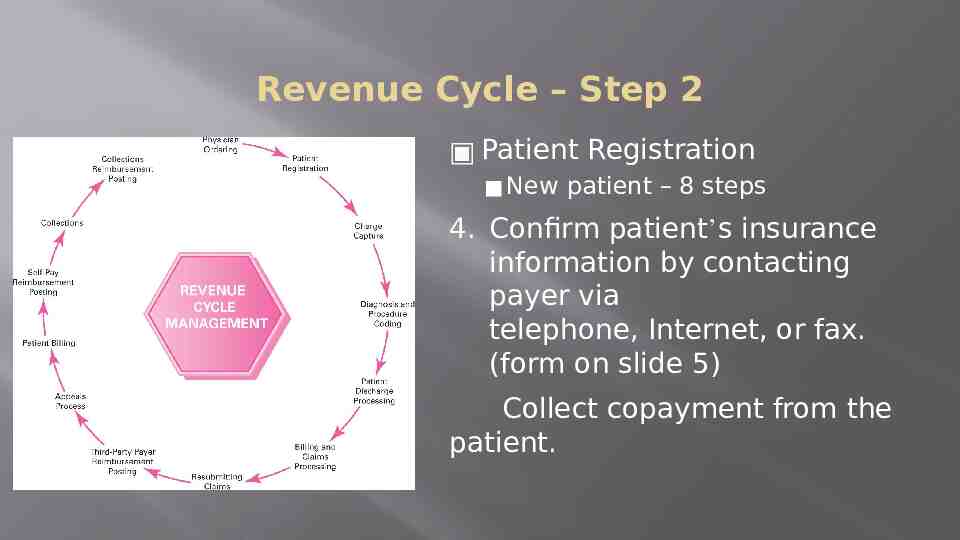
Revenue Cycle – Step 2 Patient Registration New patient – 8 steps 4. Confirm patient’s insurance information by contacting payer via telephone, Internet, or fax. (form on slide 5) Collect copayment from the patient.
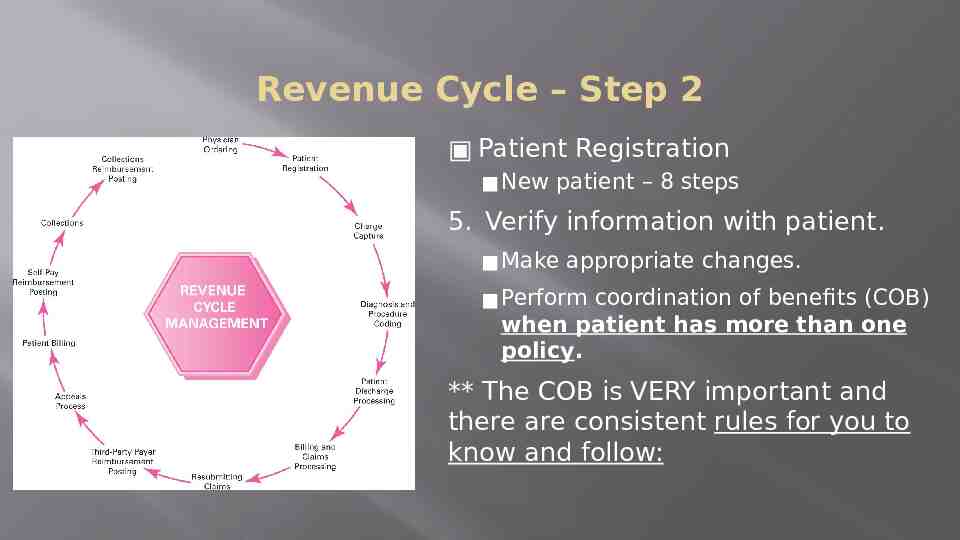
Revenue Cycle – Step 2 Patient Registration New patient – 8 steps 5. Verify information with patient. Make appropriate changes. Perform coordination of benefits (COB) when patient has more than one policy. ** The COB is VERY important and there are consistent rules for you to know and follow:
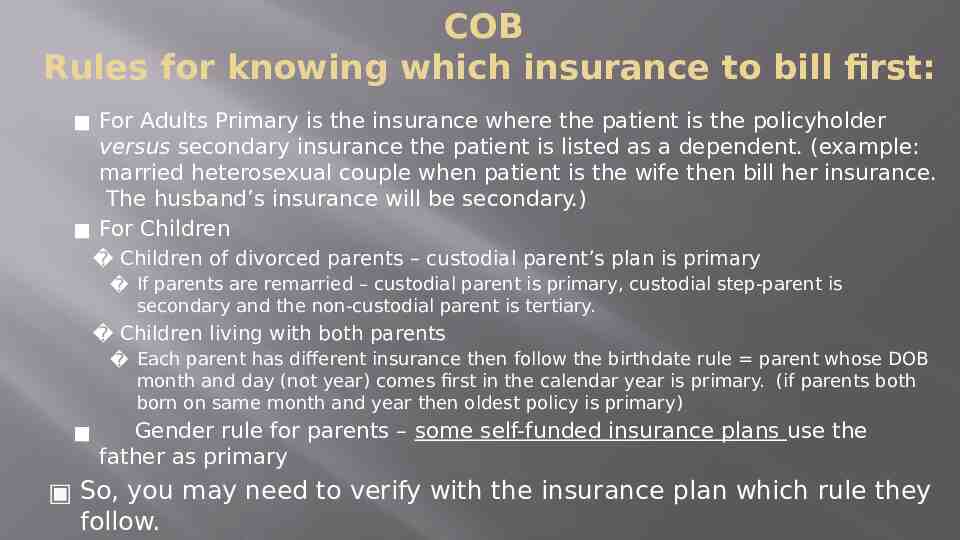
COB Rules for knowing which insurance to bill first: For Adults Primary is the insurance where the patient is the policyholder versus secondary insurance the patient is listed as a dependent. (example: married heterosexual couple when patient is the wife then bill her insurance. The husband’s insurance will be secondary.) For Children Children of divorced parents – custodial parent’s plan is primary If parents are remarried – custodial parent is primary, custodial step-parent is secondary and the non-custodial parent is tertiary. Children living with both parents Each parent has different insurance then follow the birthdate rule parent whose DOB month and day (not year) comes first in the calendar year is primary. (if parents both born on same month and year then oldest policy is primary) Gender rule for parents – some self-funded insurance plans use the father as primary So, you may need to verify with the insurance plan which rule they follow.
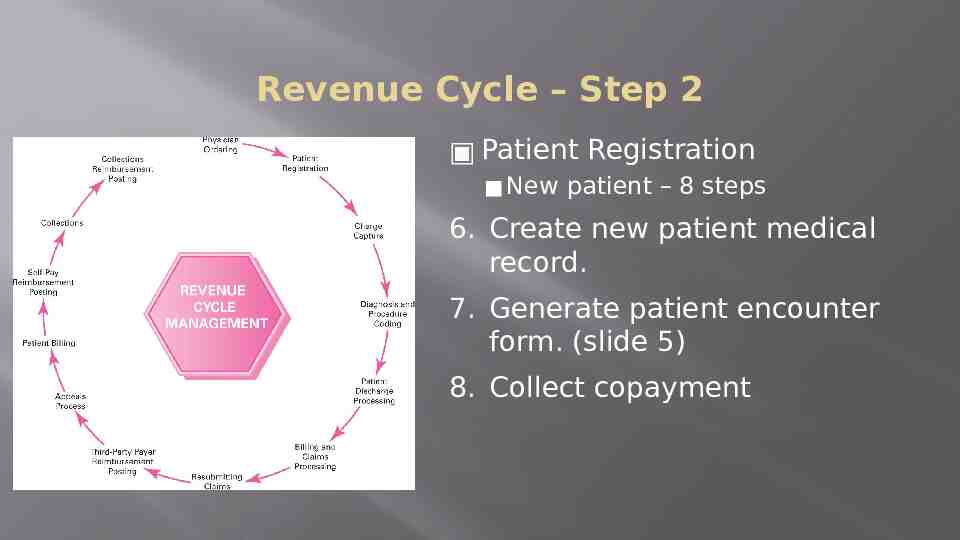
Revenue Cycle – Step 2 Patient Registration New patient – 8 steps 6. Create new patient medical record. 7. Generate patient encounter form. (slide 5) 8. Collect copayment
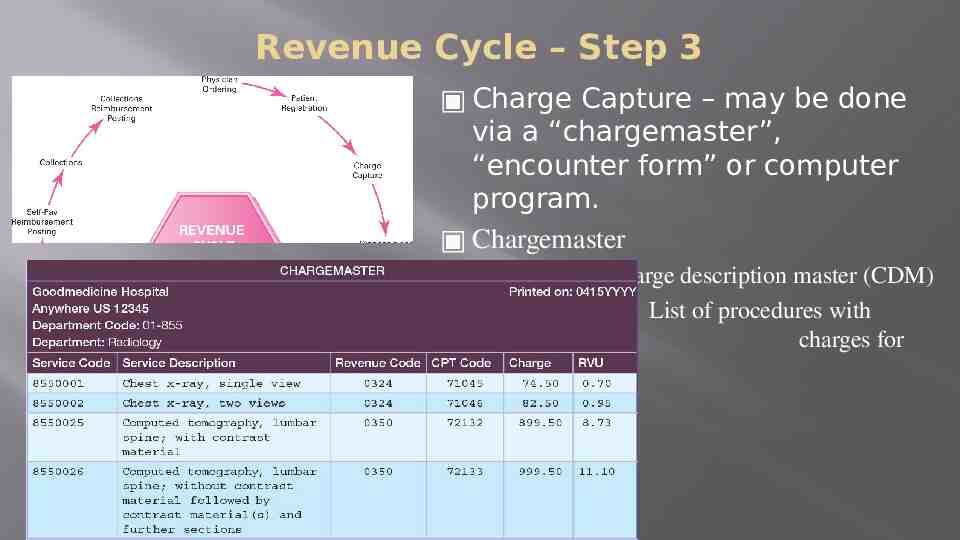
Revenue Cycle – Step 3 Charge Capture – may be done via a “chargemaster”, “encounter form” or computer program. Chargemaster Also called charge description master (CDM) List of procedures with charges for each procedure.
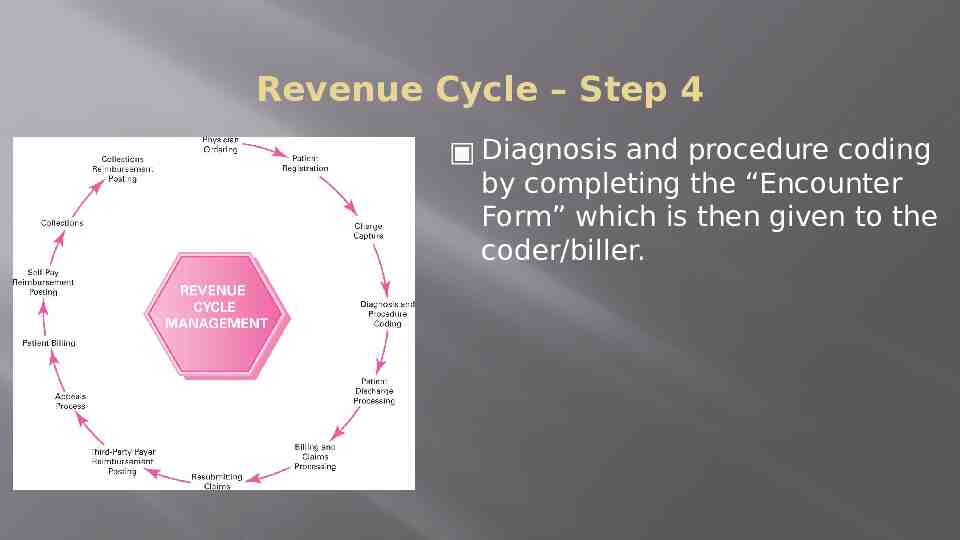
Revenue Cycle – Step 4 Diagnosis and procedure coding by completing the “Encounter Form” which is then given to the coder/biller.
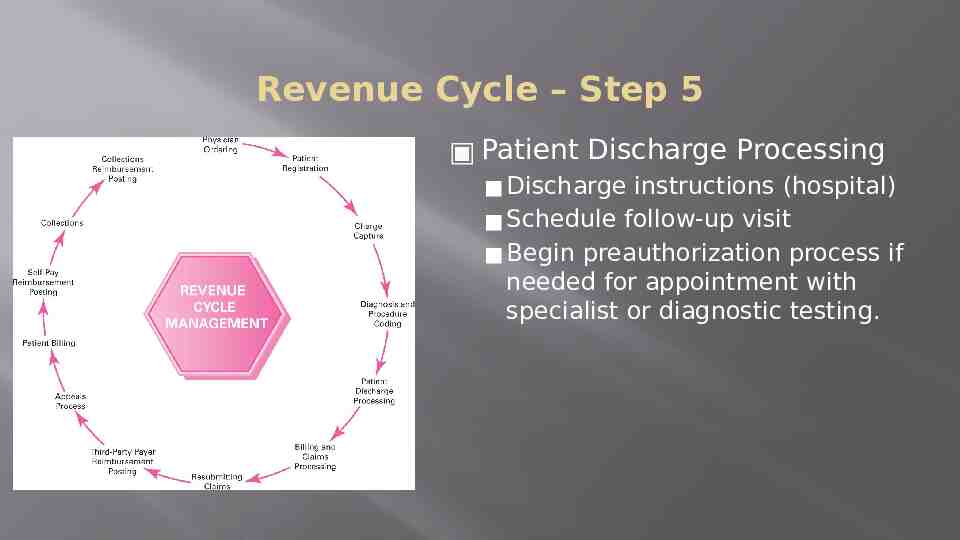
Revenue Cycle – Step 5 Patient Discharge Processing Discharge instructions (hospital) Schedule follow-up visit Begin preauthorization process if needed for appointment with specialist or diagnostic testing.
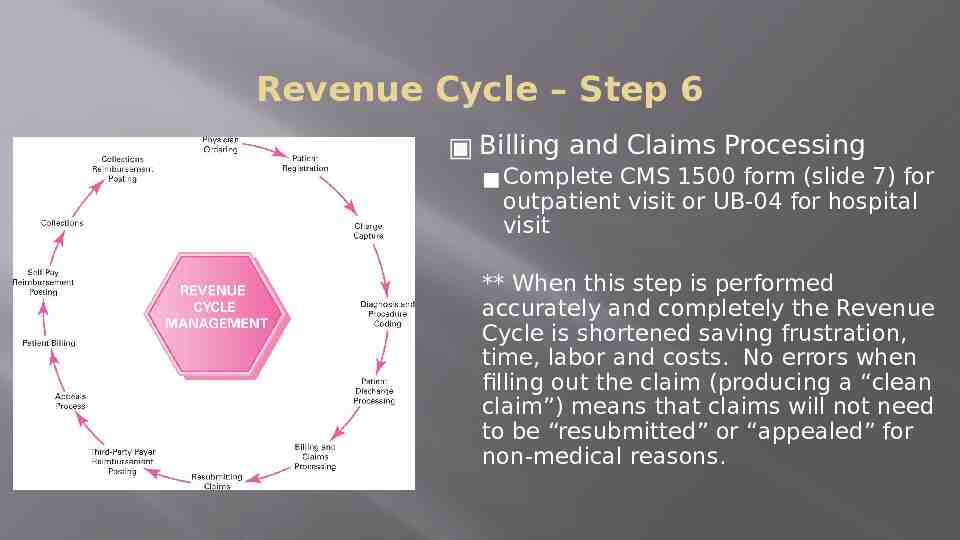
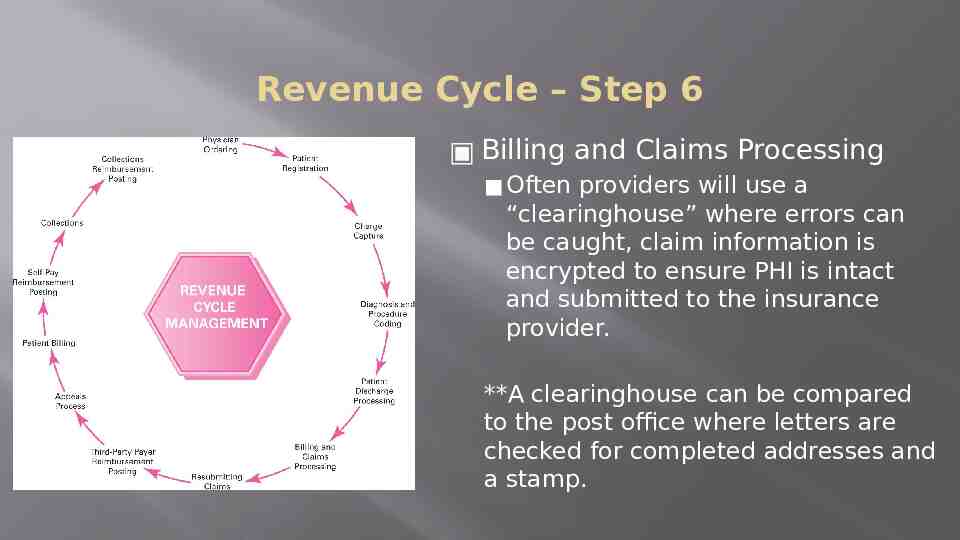
Revenue Cycle – Step 6 Billing and Claims Processing Complete CMS 1500 form (slide 7) for outpatient visit or UB-04 for hospital visit ** When this step is performed accurately and completely the Revenue Cycle is shortened saving frustration, time, labor and costs. No errors when filling out the claim (producing a “clean claim”) means that claims will not need to be “resubmitted” or “appealed” for non-medical reasons.
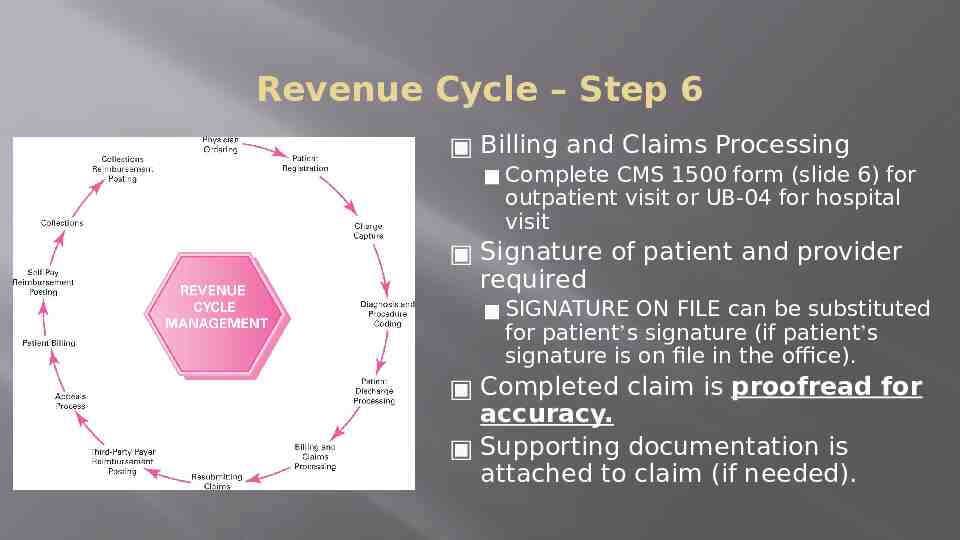
Revenue Cycle – Step 6 Billing and Claims Processing Complete CMS 1500 form (slide 6) for outpatient visit or UB-04 for hospital visit Signature of patient and provider required SIGNATURE ON FILE can be substituted for patient’s signature (if patient’s signature is on file in the office). Completed claim is proofread for accuracy. Supporting documentation is attached to claim (if needed).
Revenue Cycle – Step 6 Billing and Claims Processing Often providers will use a “clearinghouse” where errors can be caught, claim information is encrypted to ensure PHI is intact and submitted to the insurance provider. **A clearinghouse can be compared to the post office where letters are checked for completed addresses and a stamp.
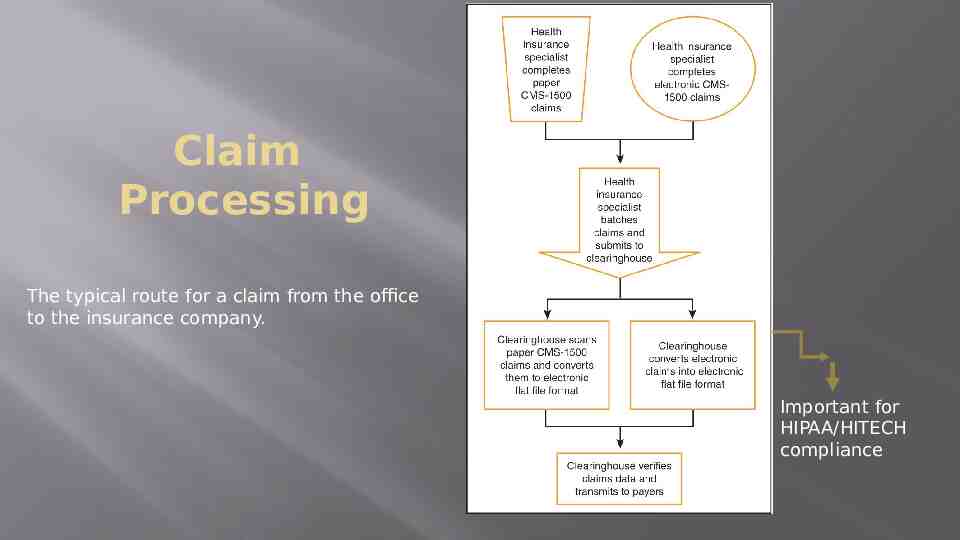
Claim Processing The typical route for a claim from the office to the insurance company. Important for HIPAA/HITECH compliance
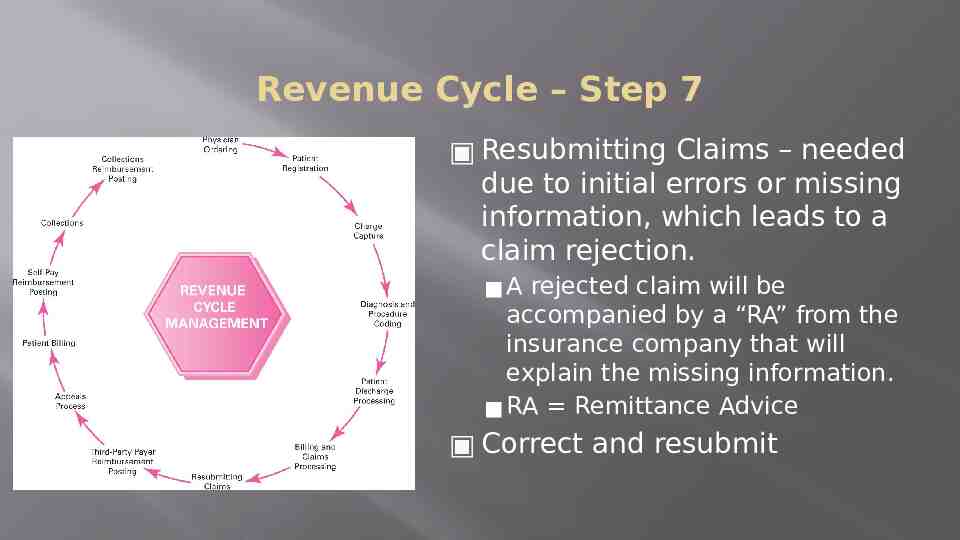
Revenue Cycle – Step 7 Resubmitting Claims – needed due to initial errors or missing information, which leads to a claim rejection. A rejected claim will be accompanied by a “RA” from the insurance company that will explain the missing information. RA Remittance Advice Correct and resubmit
Claim Processing { Insurance Adjudication Process
Why Claims are Denied Procedure/service not medically necessary Incorrect codes or incorrectly linked codes were reported. Preexisting condition not covered or failure to obtain preauthorization Noncovered benefit or termination of coverage Out-of-network provider used Lower level of care could have been provided Bundled service or global period service is not eligible for separate payment. Claim contained incomplete information or another insurance plan is primary.
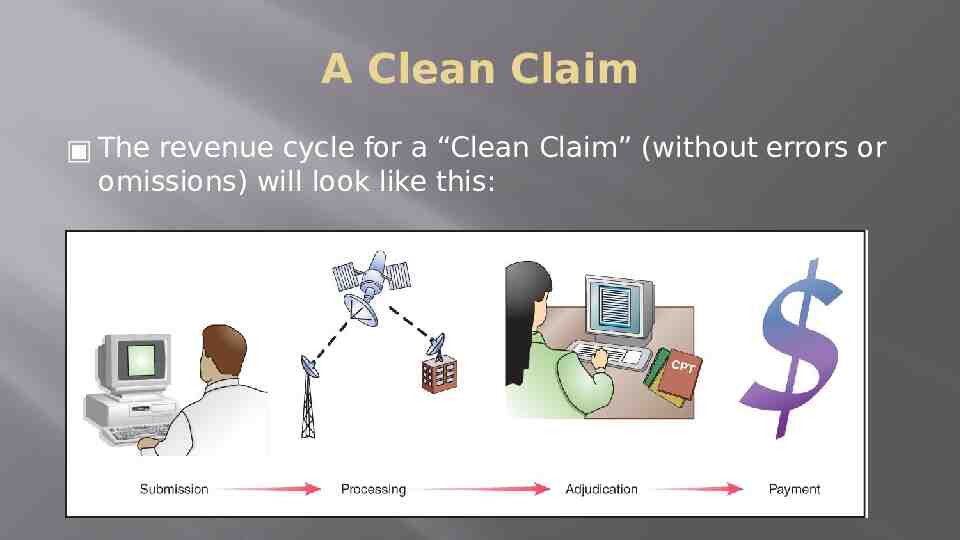
A Clean Claim The revenue cycle for a “Clean Claim” (without errors or omissions) will look like this:
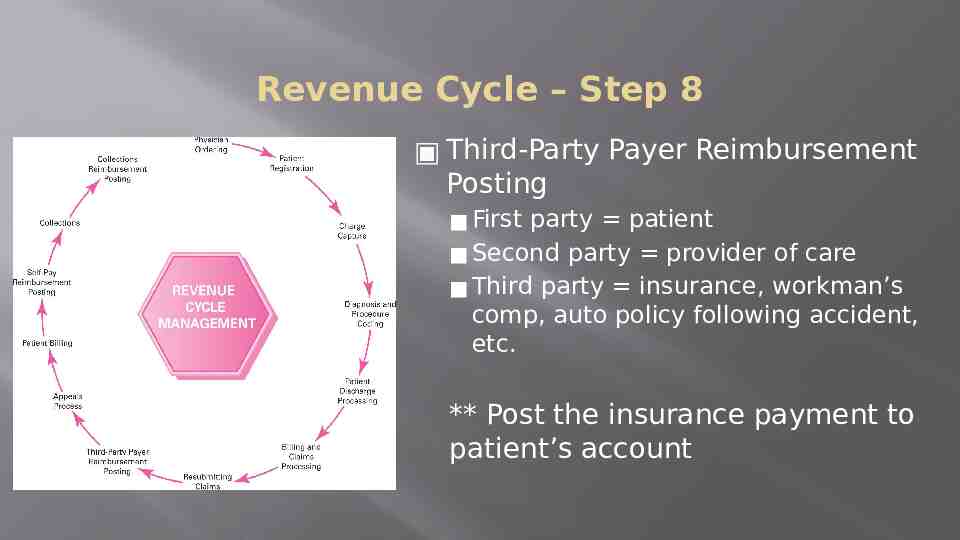
Revenue Cycle – Step 8 Third-Party Payer Reimbursement Posting First party patient Second party provider of care Third party insurance, workman’s comp, auto policy following accident, etc. ** Post the insurance payment to patient’s account
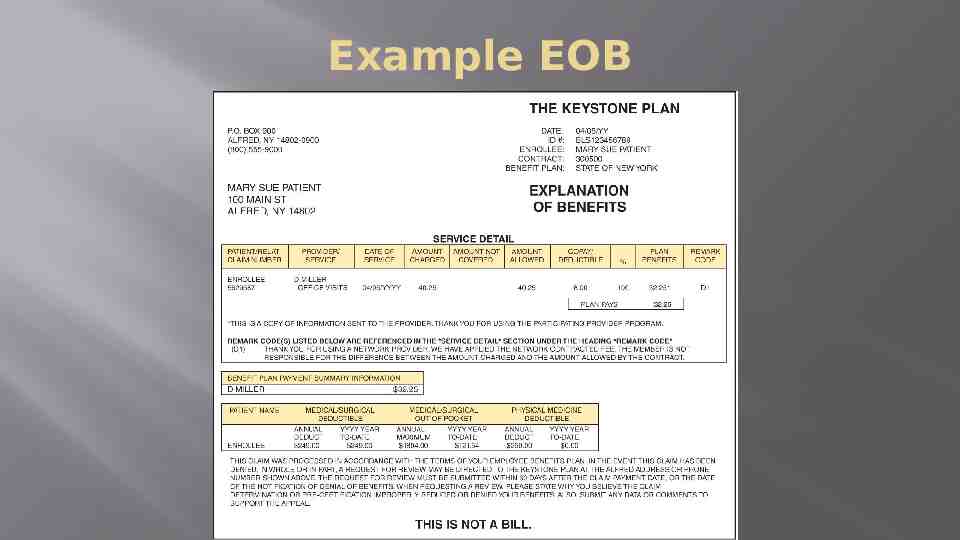
RA and EOB The Insurance company will send the provider a RA (remittance advice) explaining the payment or denial and will send the patient an EOB (explanation of benefits). The RA may look very similar to the EOB except the EOB will always say, “This is not a bill.” Example EOB on next slide
Example EOB
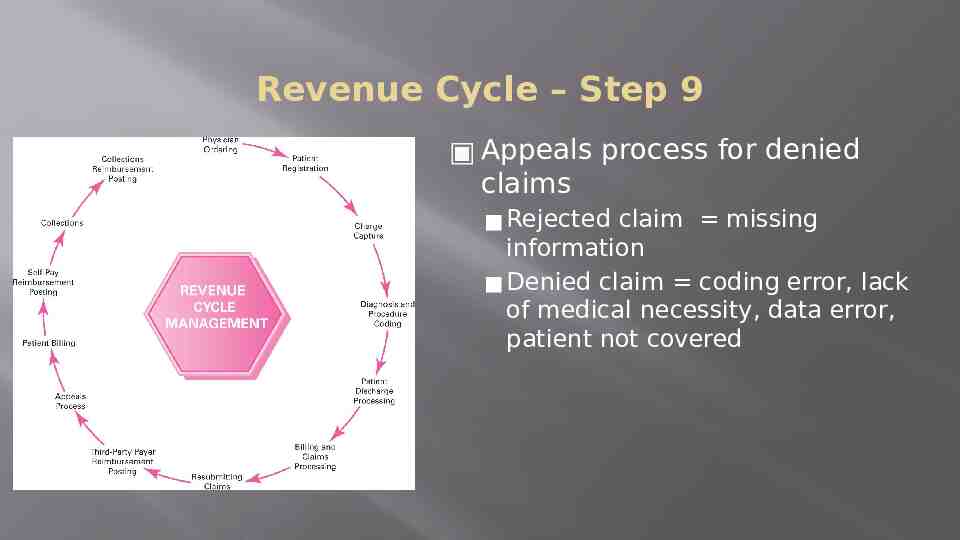
Revenue Cycle – Step 9 Appeals process for denied claims Rejected claim missing information Denied claim coding error, lack of medical necessity, data error, patient not covered
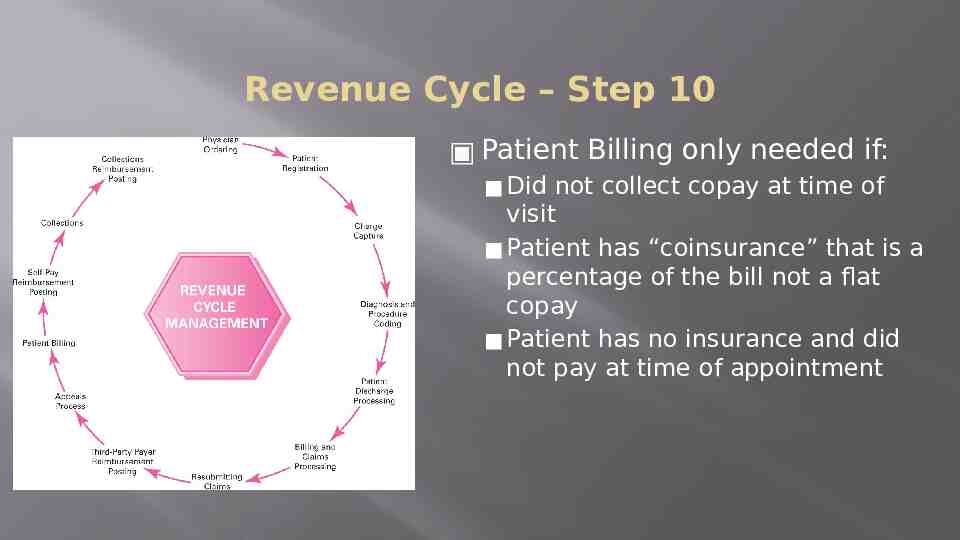
Revenue Cycle – Step 10 Patient Billing only needed if: Did not collect copay at time of visit Patient has “coinsurance” that is a percentage of the bill not a flat copay Patient has no insurance and did not pay at time of appointment
Revenue Cycle – Step 11 Patient payment is posted to their account.
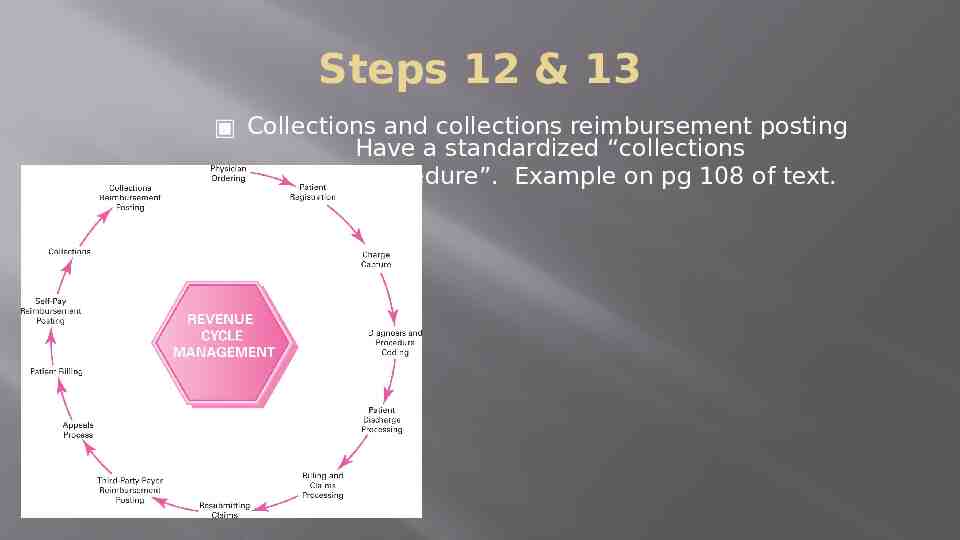
Steps 12 & 13 Collections and collections reimbursement posting Have a standardized “collections procedure”. Example on pg 108 of text.
Sample Patient Ledger The patient ledger will contain all charges, payments and write-offs (adjustment for charge that is not “allowed” by the contract agreement between the provider and the insurance company) This software tracks each “visit” as a transaction number. Some software will group by date of service. In both visits logged above, it took over one month to receive payment from the insurance company.
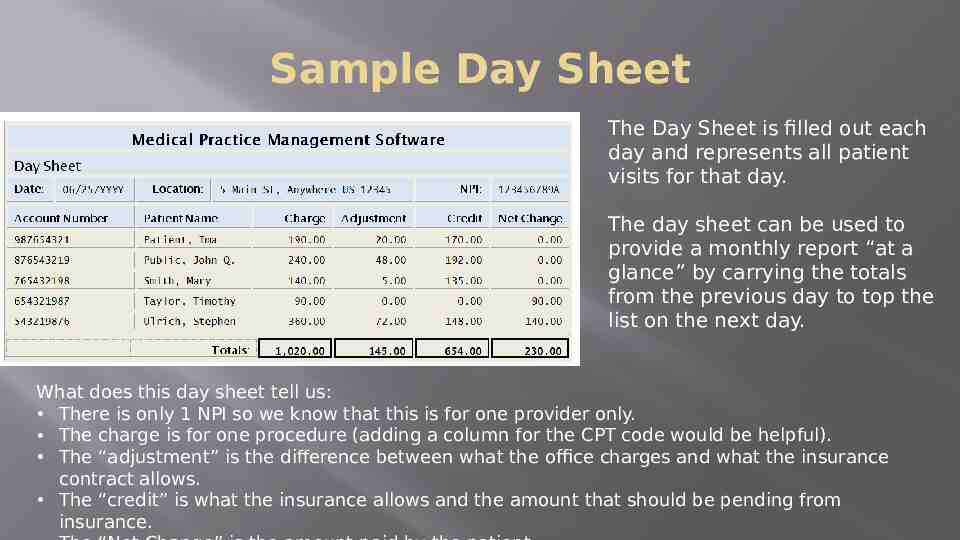
Sample Day Sheet The Day Sheet is filled out each day and represents all patient visits for that day. The day sheet can be used to provide a monthly report “at a glance” by carrying the totals from the previous day to top the list on the next day. What does this day sheet tell us: There is only 1 NPI so we know that this is for one provider only. The charge is for one procedure (adding a column for the CPT code would be helpful). The “adjustment” is the difference between what the office charges and what the insurance contract allows. The “credit” is what the insurance allows and the amount that should be pending from insurance.
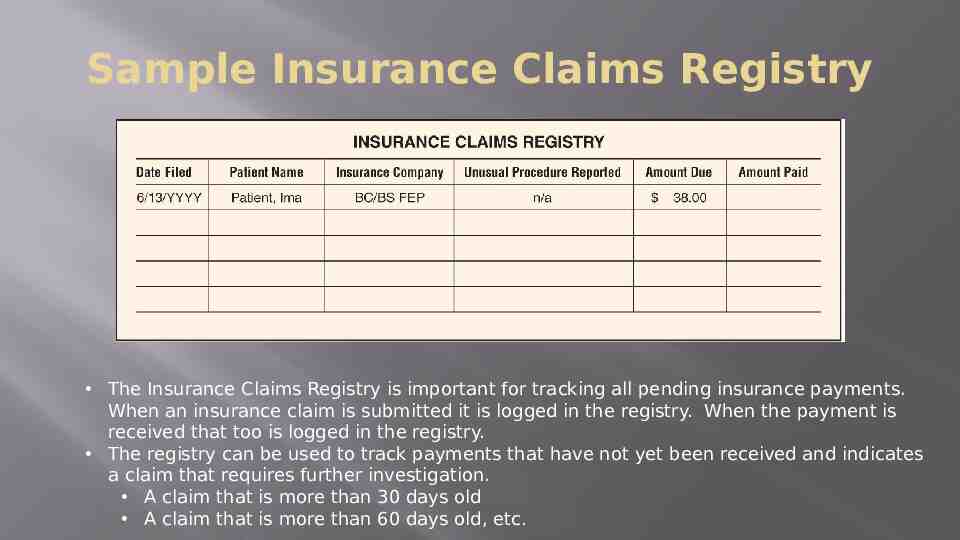
Sample Insurance Claims Registry The Insurance Claims Registry is important for tracking all pending insurance payments. When an insurance claim is submitted it is logged in the registry. When the payment is received that too is logged in the registry. The registry can be used to track payments that have not yet been received and indicates a claim that requires further investigation. A claim that is more than 30 days old A claim that is more than 60 days old, etc.