Getting Started This CBL provides introductory information on how to


71 Slides2.48 MB
Getting Started This CBL provides introductory information on how to navigate through the Acute Care System.
Upon successful completion of this course you will be able to: Use password security View the results tab View how Orders are entered Enter vitals on a flowsheet Enter documents on the Patient Profile
Guidelines for Acute Care Security After successful completion of the course, access may take up to 5 business days or less upon receipt of Acute Care access forms.
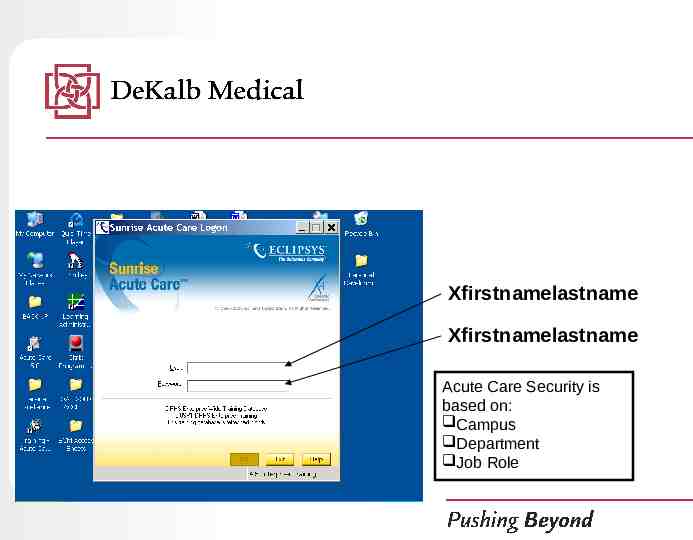
Guidelines for Acute Care Security 1. Your username & password are the same: xfirstnamelastname Example: John Doe (xjohndoe) 2. On first login, you will be prompted to create your own unique password.
Guidelines for Acute Care Security Your unique passwords should include: 6 or more characters At least one uppercase letter One number *Remember to write it down in a secure place
Steps for login on your unit Input your username and password: xfirstnamelastname (No spaces/no caps) Create your own unique password
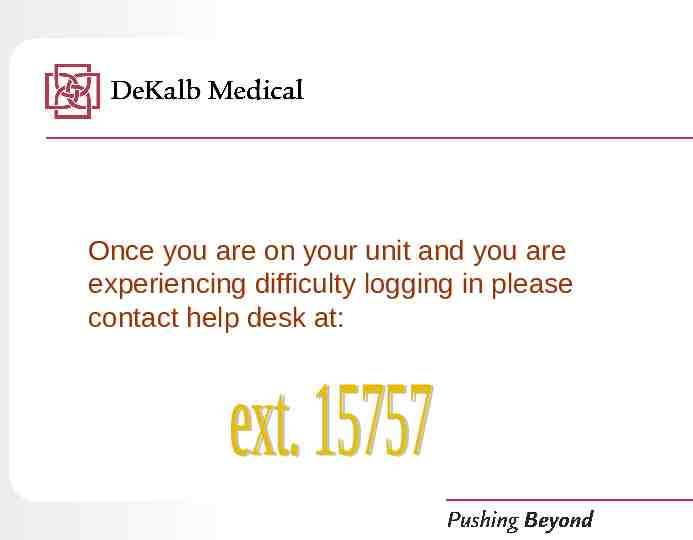
Once you are on your unit and you are experiencing difficulty logging in please contact help desk at:
Xfirstnamelastname Xfirstnamelastname Acute Care Security is based on: Campus Department Job Role
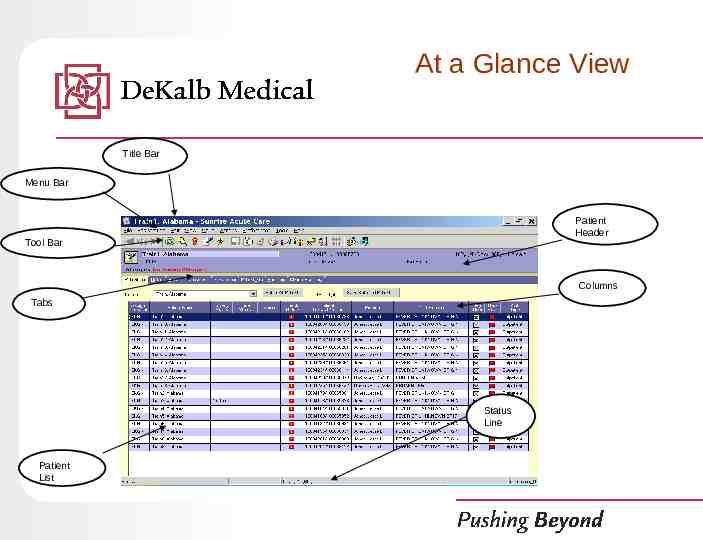
At a Glance View Title Bar Menu Bar Patient Header Tool Bar Columns Tabs Status Line Patient List
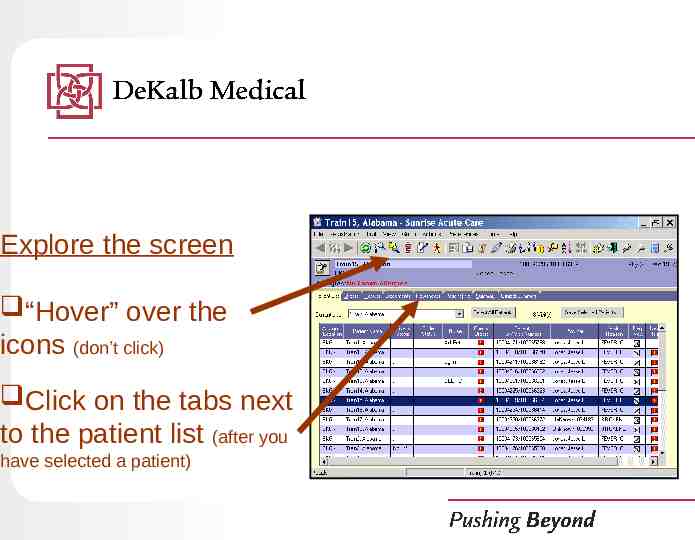
Explore the screen “Hover” over the icons (don’t click) Click on the tabs next to the patient list (after you have selected a patient)
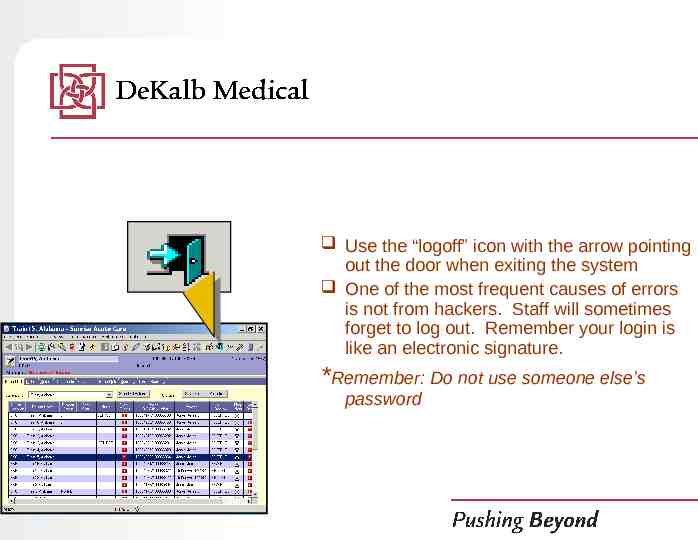
Use the “logoff” icon with the arrow pointing out the door when exiting the system One of the most frequent causes of errors is not from hackers. Staff will sometimes forget to log out. Remember your login is like an electronic signature. *Remember: Do not use someone else’s password
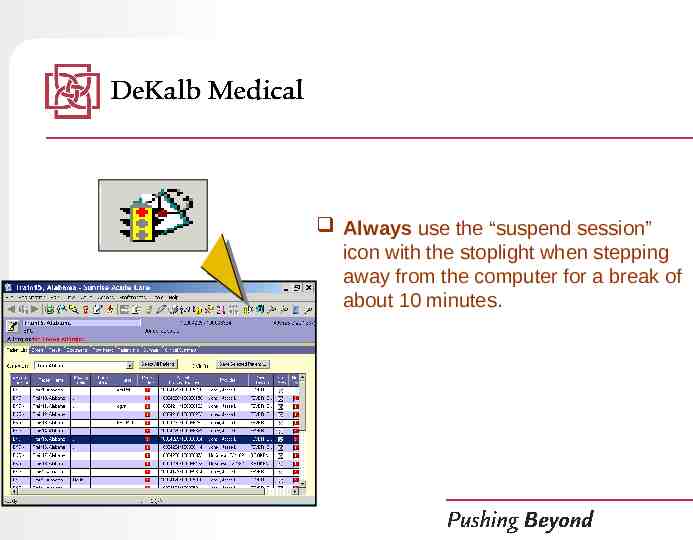
Always use the “suspend session” icon with the stoplight when stepping away from the computer for a break of about 10 minutes.
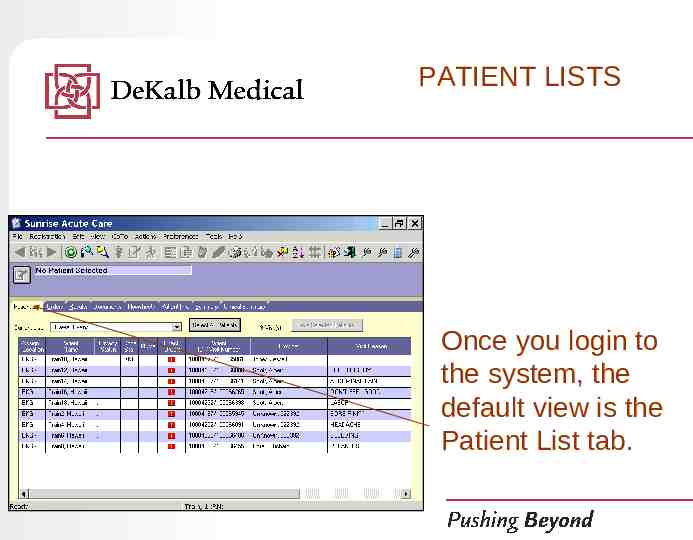
PATIENT LISTS Once you login to the system, the default view is the Patient List tab.
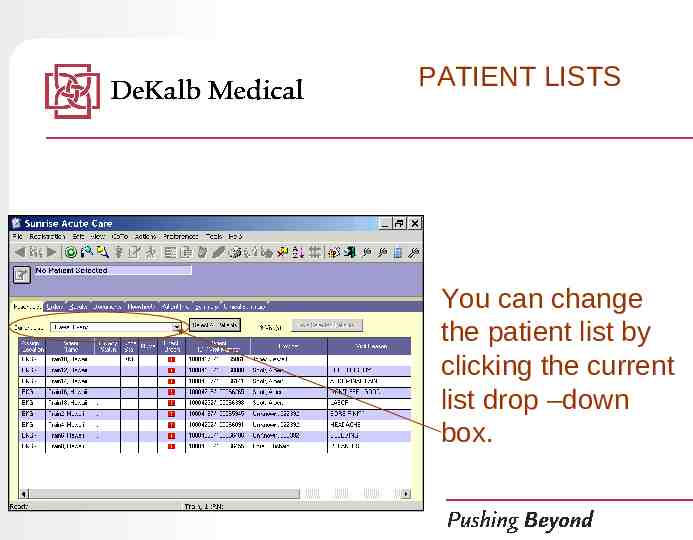
PATIENT LISTS You can change the patient list by clicking the current list drop –down box.
PATIENT LISTS Click on a patient
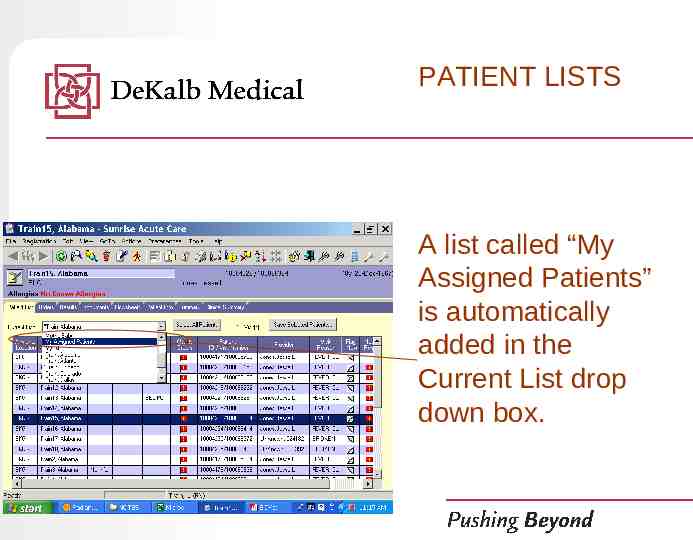
PATIENT LISTS A list called “My Assigned Patients” is automatically added in the Current List drop down box.
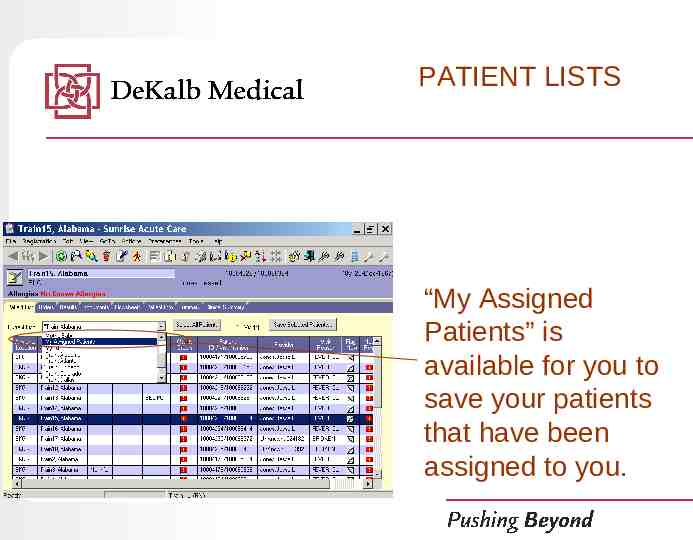
PATIENT LISTS “My Assigned Patients” is available for you to save your patients that have been assigned to you.
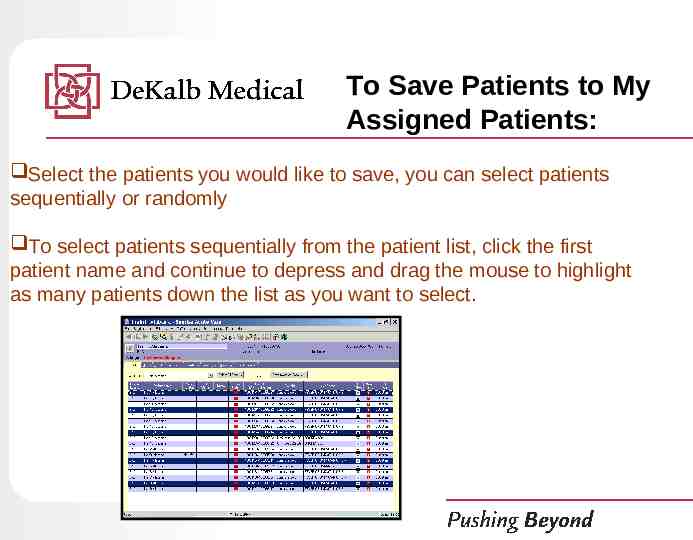
To Save Patients to My Assigned Patients: Select the patients you would like to save, you can select patients sequentially or randomly To select patients sequentially from the patient list, click the first patient name and continue to depress and drag the mouse to highlight as many patients down the list as you want to select.
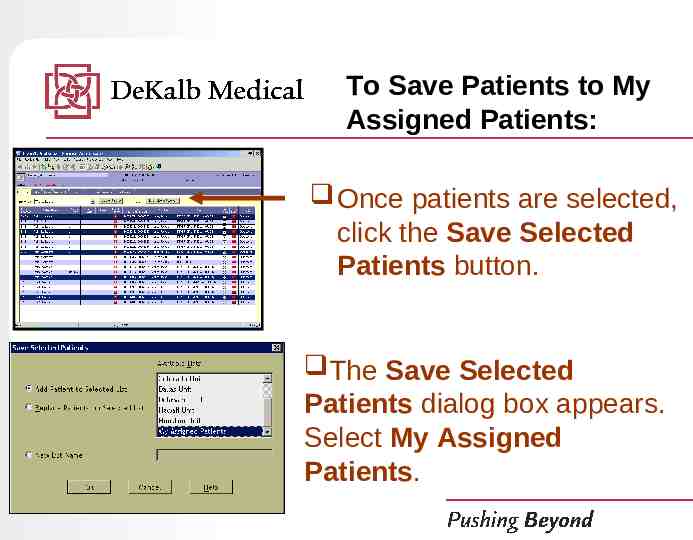
To Save Patients to My Assigned Patients: Once patients are selected, click the Save Selected Patients button. The Save Selected Patients dialog box appears. Select My Assigned Patients.
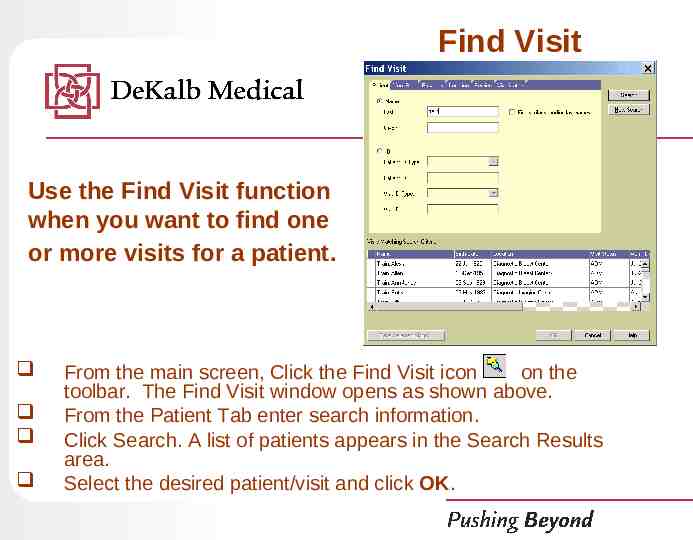
Find Visit Use the Find Visit function when you want to find one or more visits for a patient. From the main screen, Click the Find Visit icon on the toolbar. The Find Visit window opens as shown above. From the Patient Tab enter search information. Click Search. A list of patients appears in the Search Results area. Select the desired patient/visit and click OK.
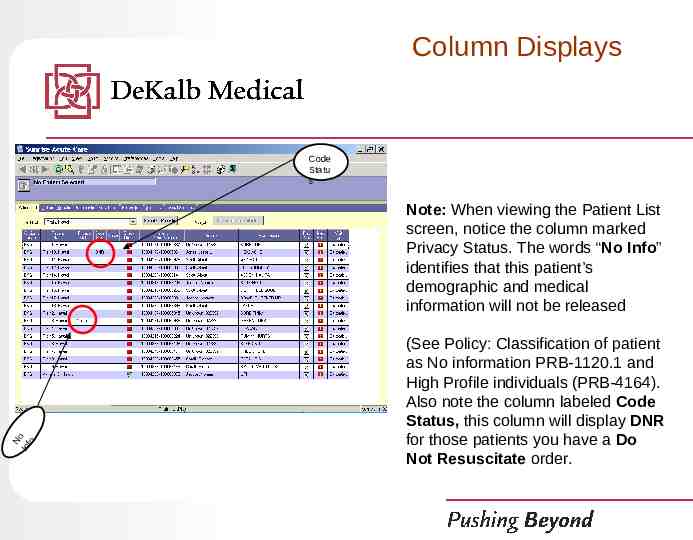
Column Displays Code Statu s No Inf o Note: When viewing the Patient List screen, notice the column marked Privacy Status. The words “No Info” identifies that this patient’s demographic and medical information will not be released (See Policy: Classification of patient as No information PRB-1120.1 and High Profile individuals (PRB-4164). Also note the column labeled Code Status, this column will display DNR for those patients you have a Do Not Resuscitate order.
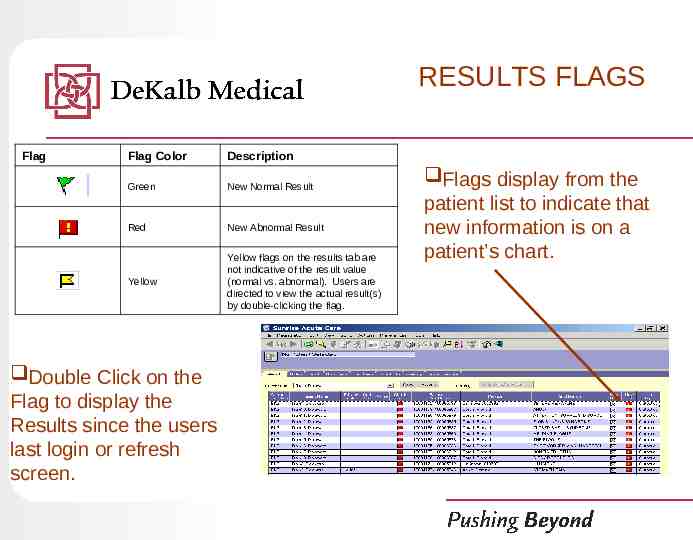
RESULTS FLAGS Flag Flag Color Description Green New Normal Result Red New Abnormal Result Yellow Yellow flags on the results tab are not indicative of the result value (normal vs. abnormal). Users are directed to view the actual result(s) by double-clicking the flag. Double Click on the Flag to display the Results since the users last login or refresh screen. Flags display from the patient list to indicate that new information is on a patient’s chart.
Once you select a patient, information about that patient is available on the other tabs.
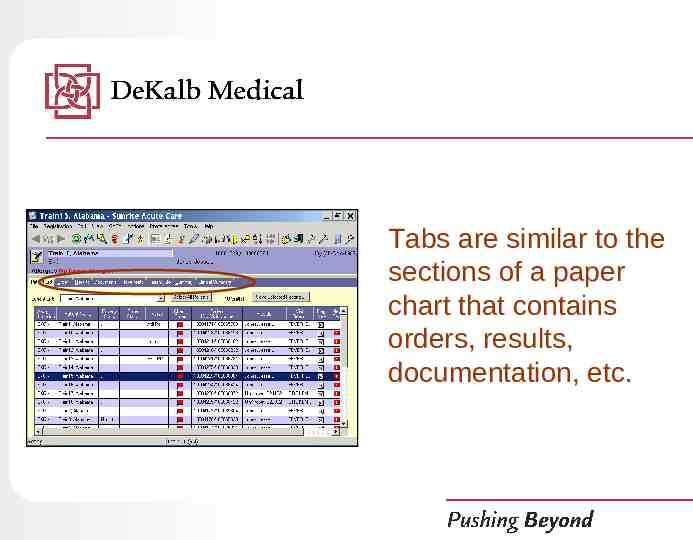
Tabs are similar to the sections of a paper chart that contains orders, results, documentation, etc.
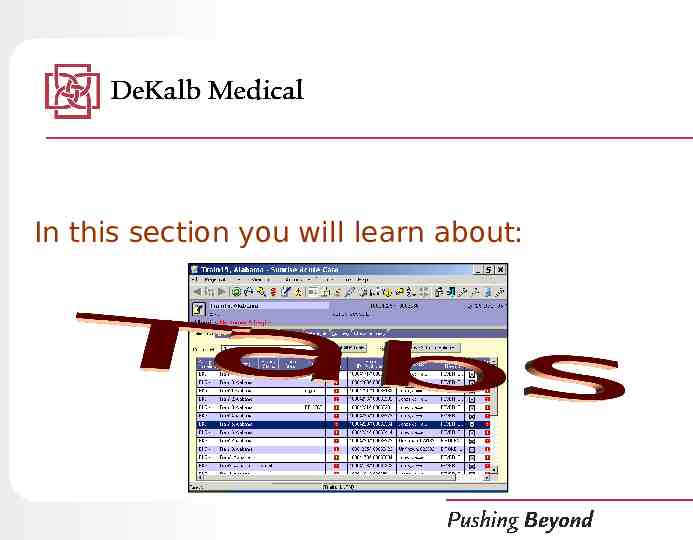
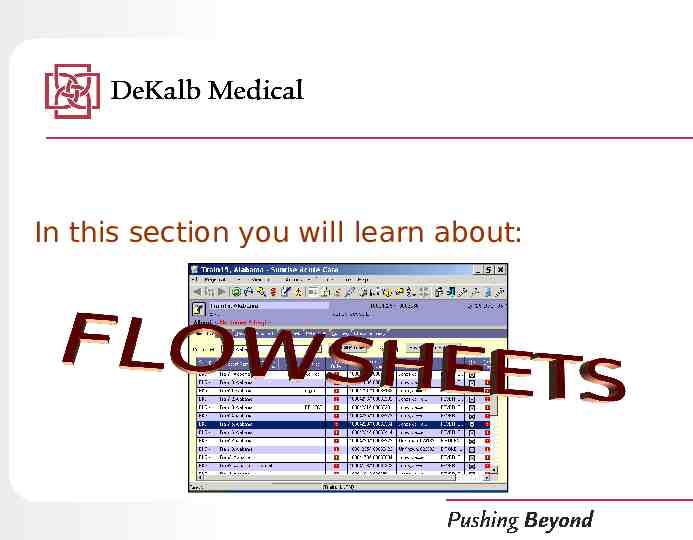
In this section you will learn about:
TABS This section provides information to help you: Understand how TABS work Understand and view RESULTS and ORDERS
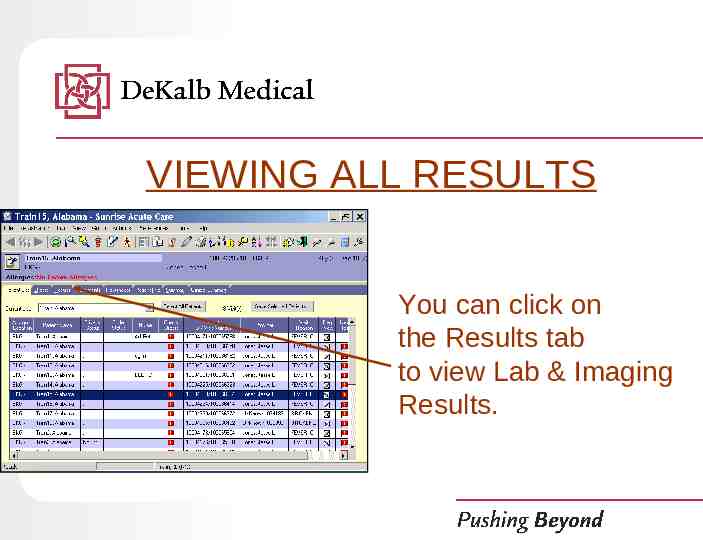
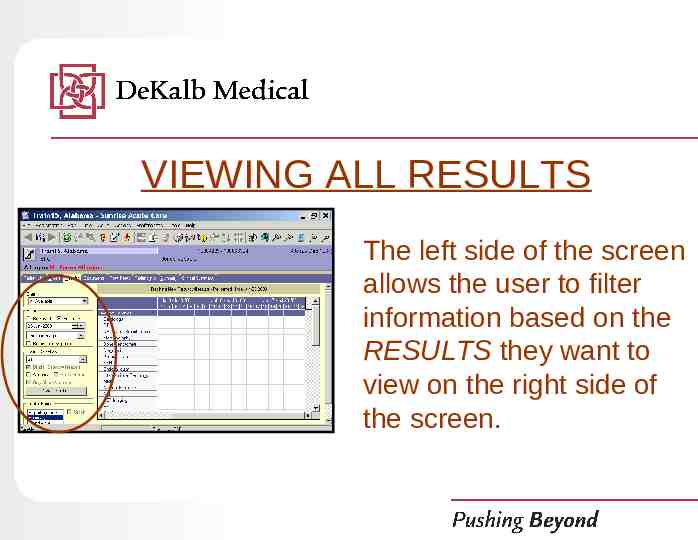
VIEWING ALL RESULTS You can click on the Results tab to view Lab & Imaging Results.
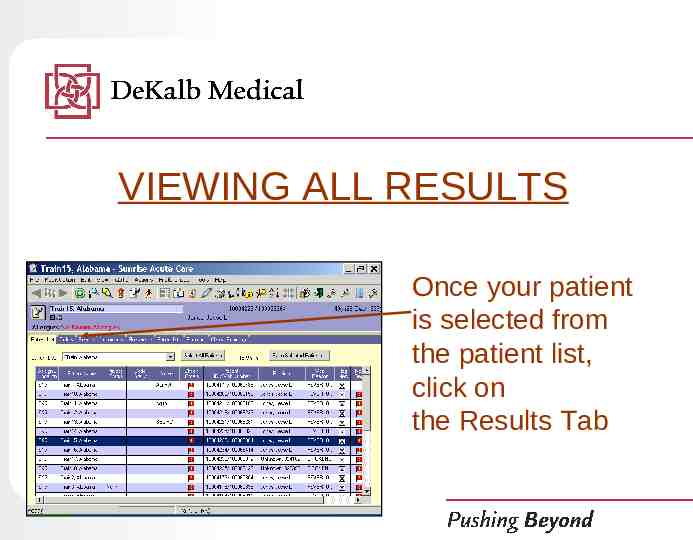
VIEWING ALL RESULTS Once your patient is selected from the patient list, click on the Results Tab
VIEWING ALL RESULTS The left side of the screen allows the user to filter information based on the RESULTS they want to view on the right side of the screen.
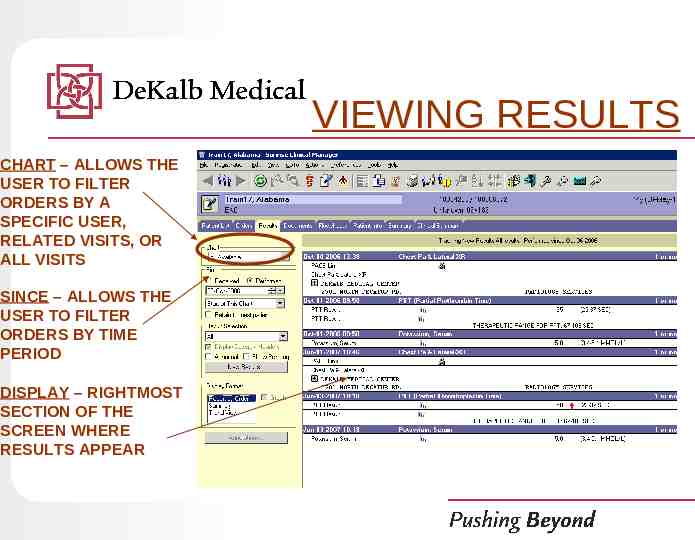
VIEWING RESULTS CHART – ALLOWS THE USER TO FILTER ORDERS BY A SPECIFIC USER, RELATED VISITS, OR ALL VISITS SINCE – ALLOWS THE USER TO FILTER ORDERS BY TIME PERIOD DISPLAY – RIGHTMOST SECTION OF THE SCREEN WHERE RESULTS APPEAR
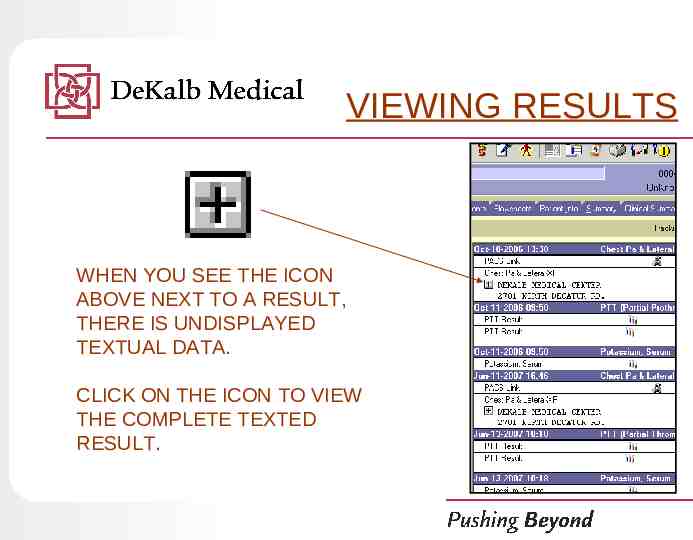
VIEWING RESULTS WHEN YOU SEE THE ICON ABOVE NEXT TO A RESULT, THERE IS UNDISPLAYED TEXTUAL DATA. CLICK ON THE ICON TO VIEW THE COMPLETE TEXTED RESULT.
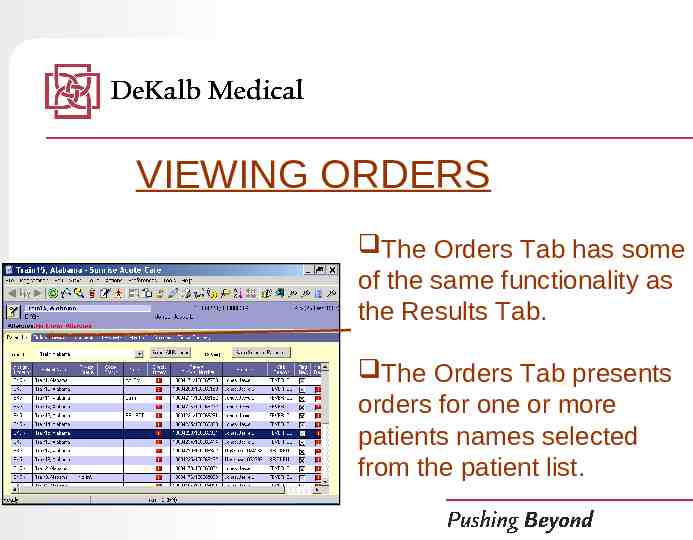
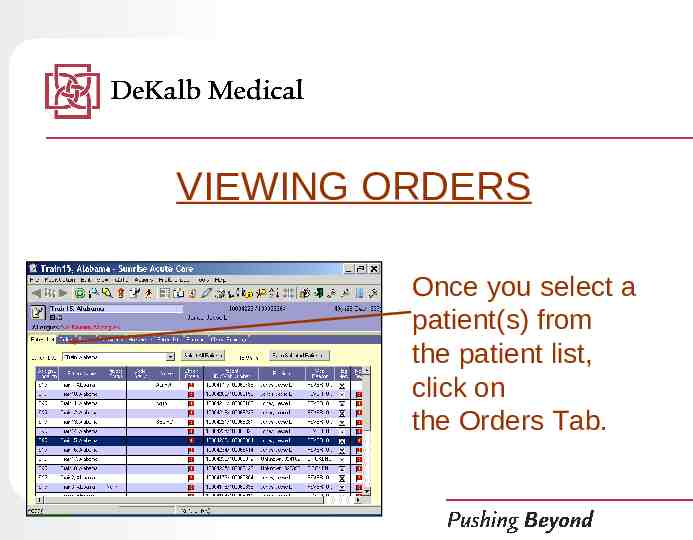
VIEWING ORDERS The Orders Tab has some of the same functionality as the Results Tab. The Orders Tab presents orders for one or more patients names selected from the patient list.
VIEWING ORDERS Once you select a patient(s) from the patient list, click on the Orders Tab.
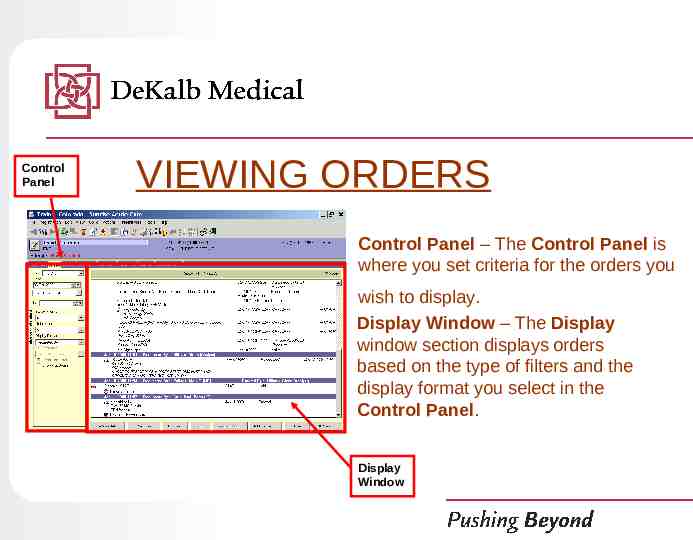
Control Panel VIEWING ORDERS Control Panel – The Control Panel is where you set criteria for the orders you wish to display. Display Window – The Display window section displays orders based on the type of filters and the display format you select in the Control Panel. Display Window
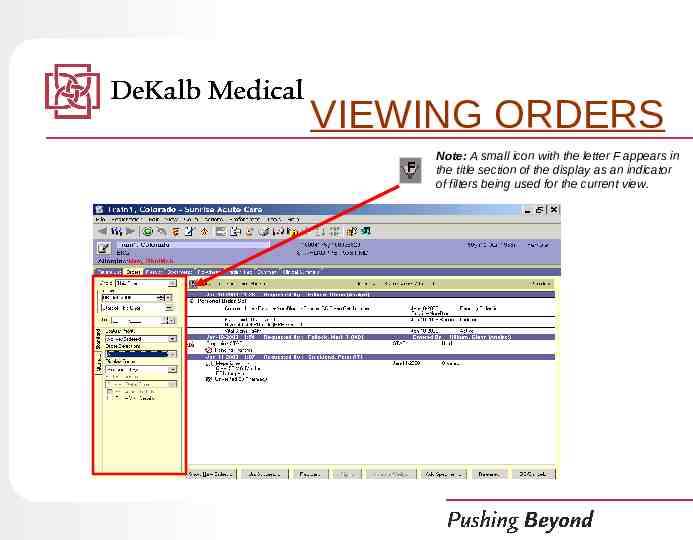
VIEWING ORDERS Note: A small icon with the letter F appears in the title section of the display as an indicator of filters being used for the current view.
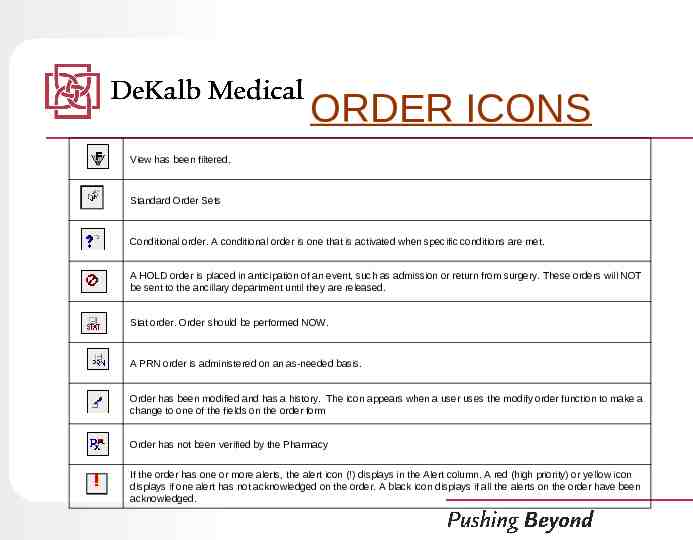
ORDER ICONS View has been filtered. Standard Order Sets Conditional order. A conditional order is one that is activated when specific conditions are met. A HOLD order is placed in anticipation of an event, such as admission or return from surgery. These orders will NOT be sent to the ancillary department until they are released. Stat order. Order should be performed NOW. A PRN order is administered on an as-needed basis. Order has been modified and has a history. The icon appears when a user uses the modify order function to make a change to one of the fields on the order form Order has not been verified by the Pharmacy If the order has one or more alerts, the alert icon (!) displays in the Alert column. A red (high priority) or yellow icon displays if one alert has not acknowledged on the order. A black icon displays if all the alerts on the order have been acknowledged.
In this section you will learn about:
FLOWSHEETS This section provides information to help you: Understand the Flowsheet chart section Understand and work with a flowsheet columns, rows & cells
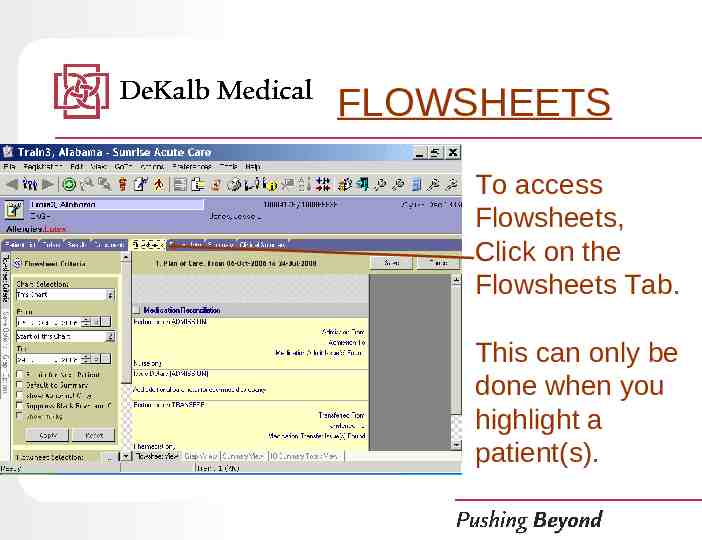
FLOWSHEETS To access Flowsheets, Click on the Flowsheets Tab. This can only be done when you highlight a patient(s).
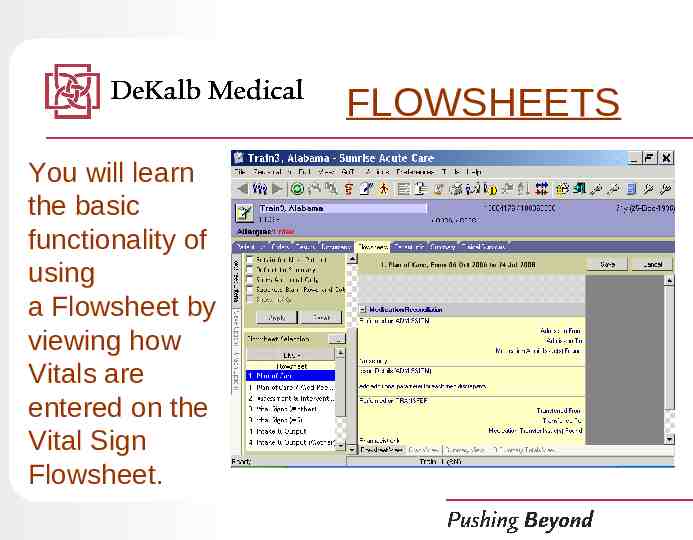
FLOWSHEETS You will learn the basic functionality of using a Flowsheet by viewing how Vitals are entered on the Vital Sign Flowsheet.
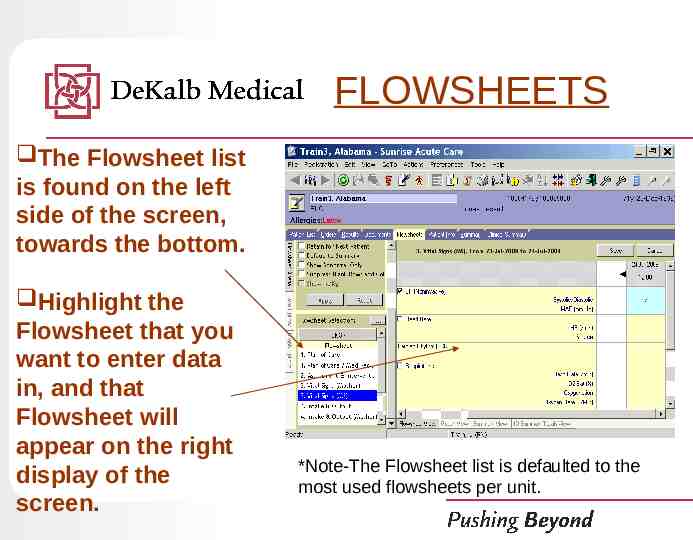
FLOWSHEETS The Flowsheet list is found on the left side of the screen, towards the bottom. Highlight the Flowsheet that you want to enter data in, and that Flowsheet will appear on the right display of the screen. *Note-The Flowsheet list is defaulted to the most used flowsheets per unit.
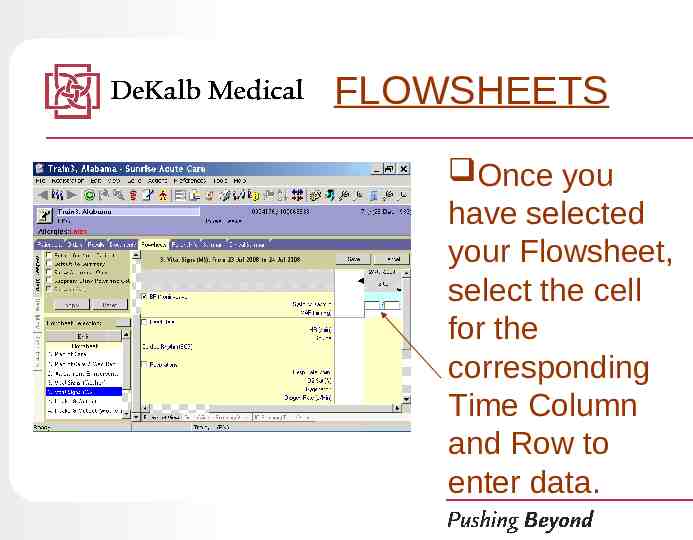
FLOWSHEETS Once you have selected your Flowsheet, select the cell for the corresponding Time Column and Row to enter data.
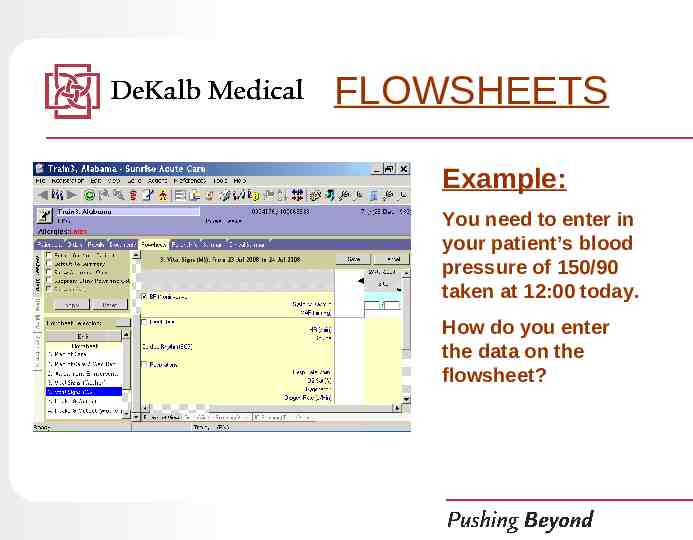
FLOWSHEETS Example: You need to enter in your patient’s blood pressure of 150/90 taken at 12:00 today. How do you enter the data on the flowsheet?
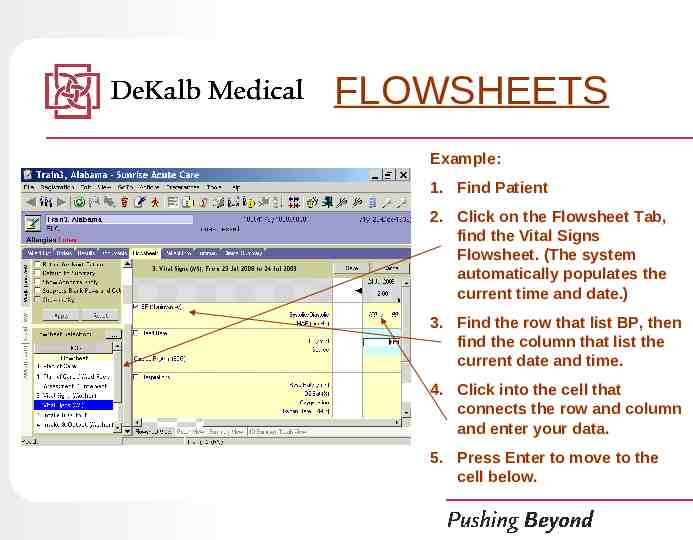
FLOWSHEETS Example: 1. Find Patient 2. Click on the Flowsheet Tab, find the Vital Signs Flowsheet. (The system automatically populates the current time and date.) 3. Find the row that list BP, then find the column that list the current date and time. 4. Click into the cell that connects the row and column and enter your data. 5. Press Enter to move to the cell below.
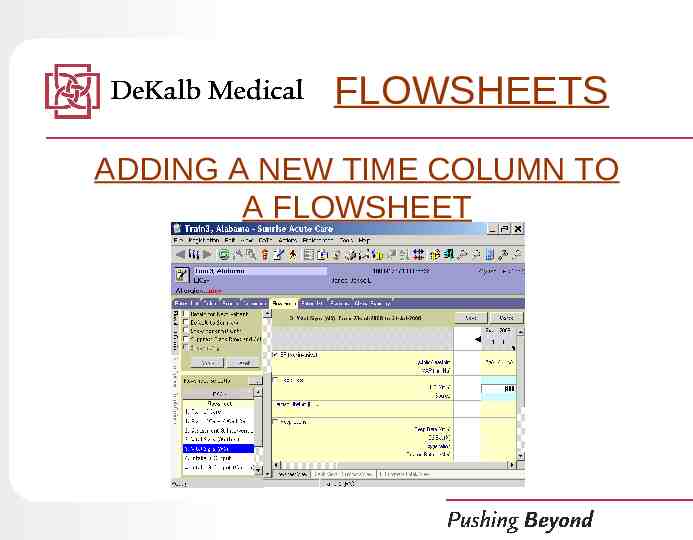
FLOWSHEETS ADDING A NEW TIME COLUMN TO A FLOWSHEET
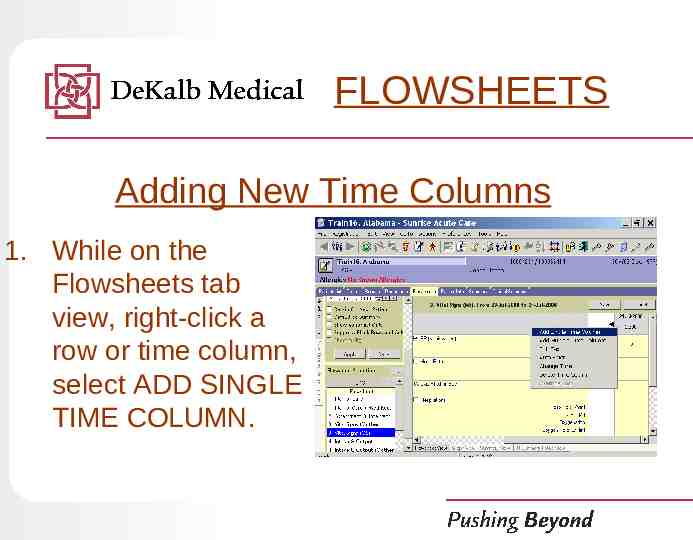
FLOWSHEETS Adding New Time Columns 1. While on the Flowsheets tab view, right-click a row or time column, select ADD SINGLE TIME COLUMN.
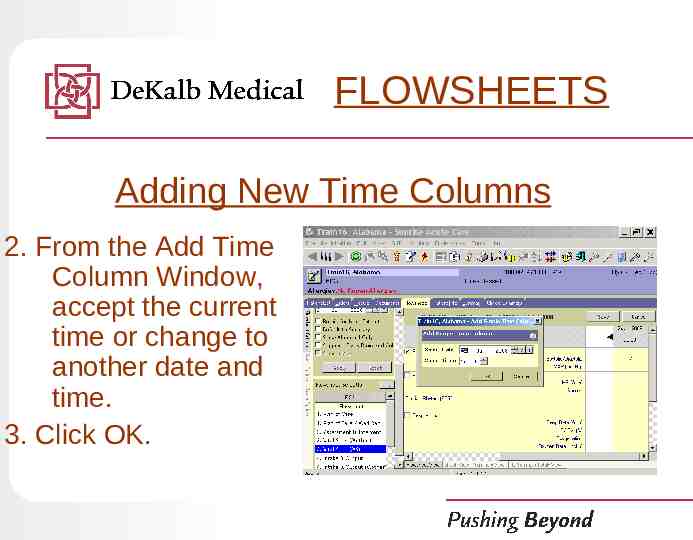
FLOWSHEETS Adding New Time Columns 2. From the Add Time Column Window, accept the current time or change to another date and time. 3. Click OK.
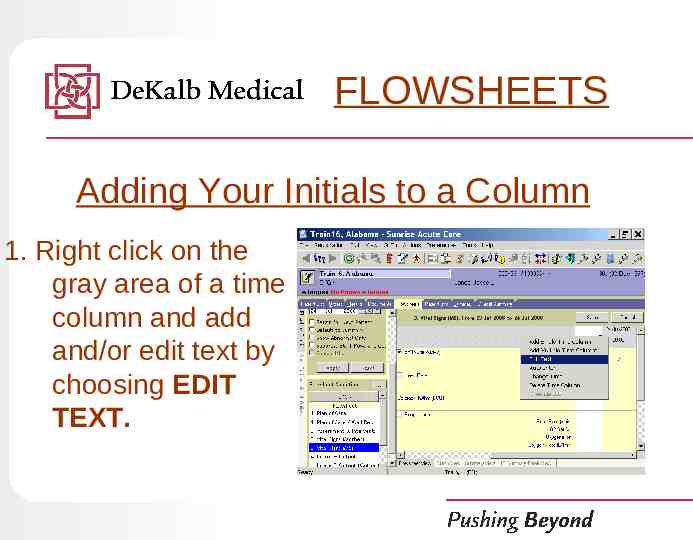
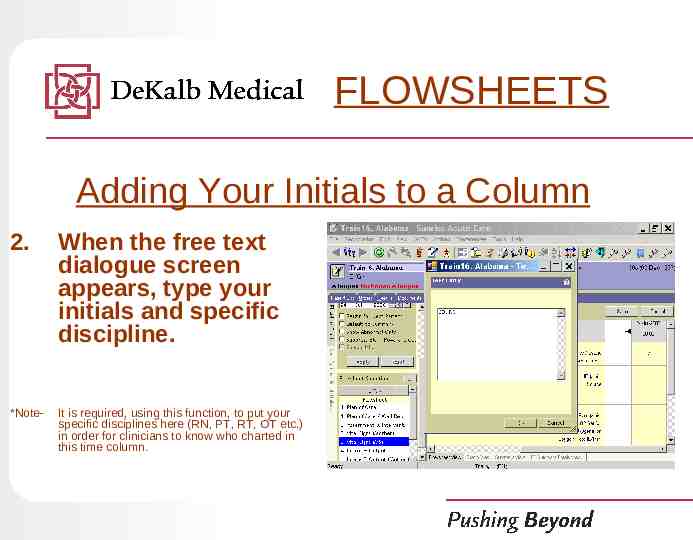
FLOWSHEETS Adding Your Initials to a Column 1. Right click on the gray area of a time column and add and/or edit text by choosing EDIT TEXT.
FLOWSHEETS Adding Your Initials to a Column 2. When the free text dialogue screen appears, type your initials and specific discipline. *Note- It is required, using this function, to put your specific disciplines here (RN, PT, RT, OT etc.) in order for clinicians to know who charted in this time column.
All Flowsheets work in a very similar way. The functionality of entering data, adding rows & columns, and initials is the same.
In this section you will learn about:
Introduction to the Patient Profile Use the Patient Profile to record –Allergies –Height and Weight –All required patient information
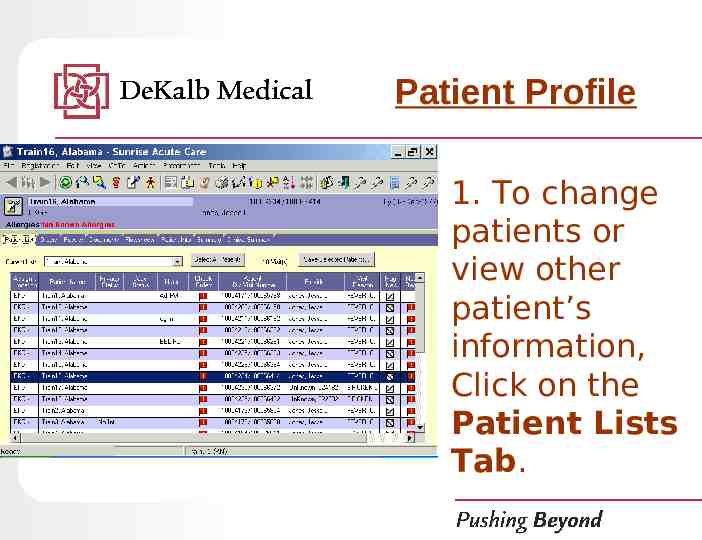
Patient Profile 1. To change patients or view other patient’s information, Click on the Patient Lists Tab.
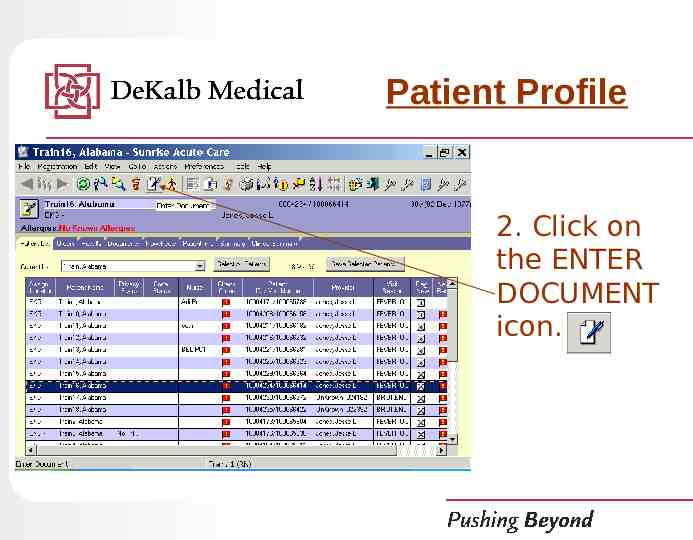
Patient Profile 2. Click on the ENTER DOCUMENT icon.
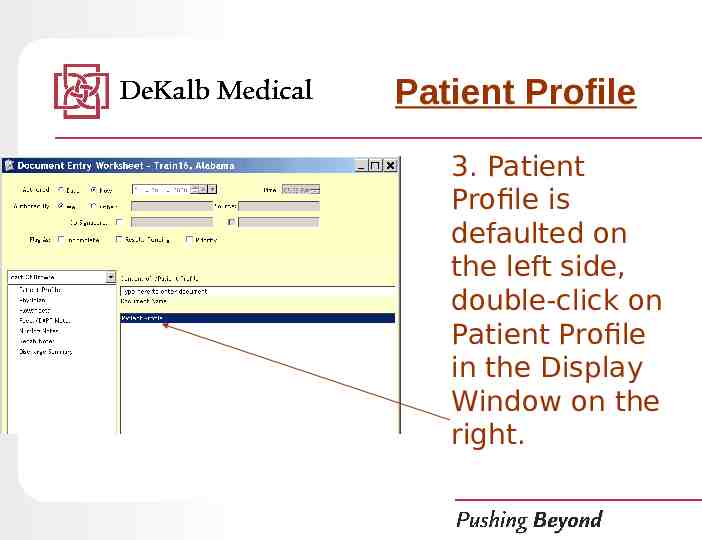
Patient Profile 3. Patient Profile is defaulted on the left side, double-click on Patient Profile in the Display Window on the right.
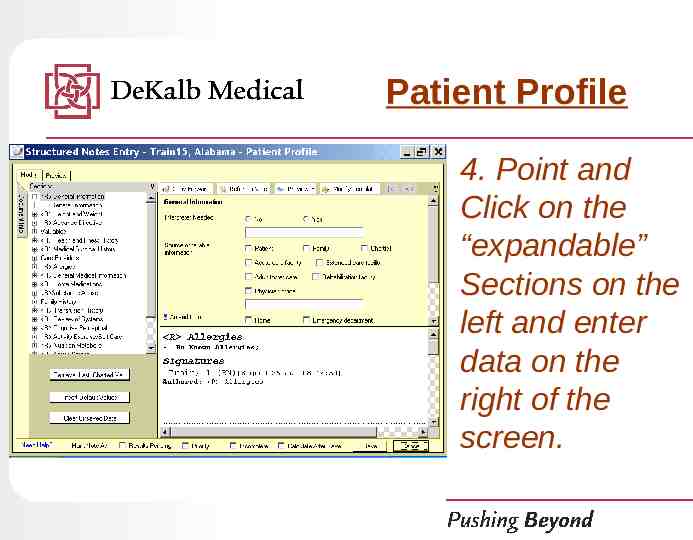
Patient Profile 4. Point and Click on the “expandable” Sections on the left and enter data on the right of the screen.
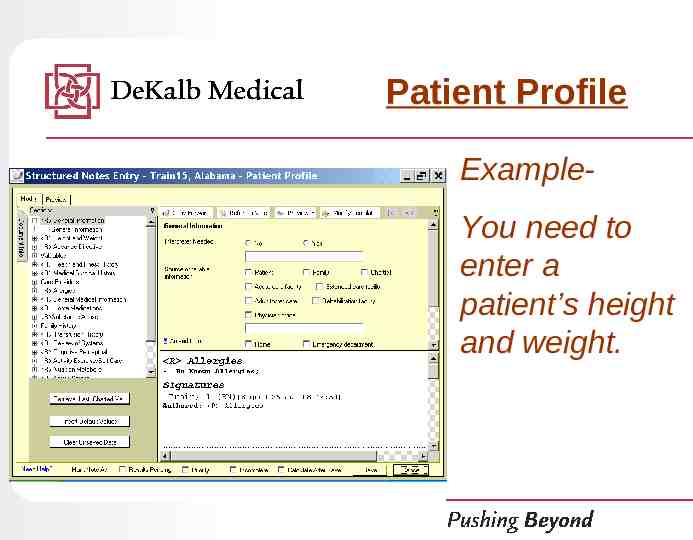
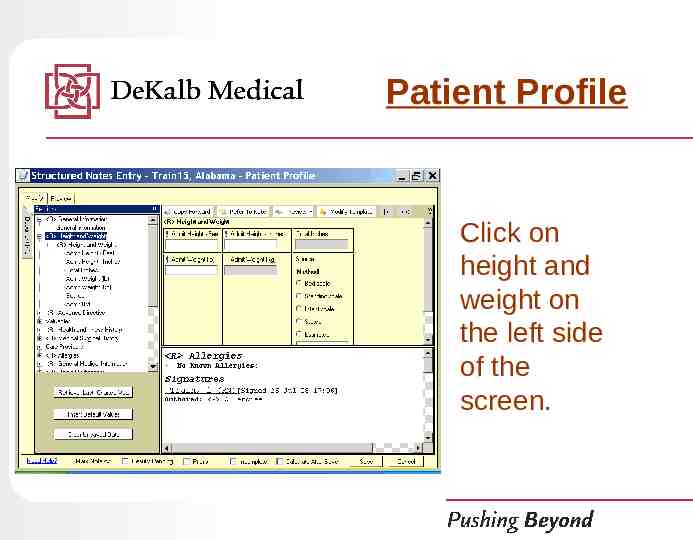
Patient Profile ExampleYou need to enter a patient’s height and weight.
Patient Profile Click on height and weight on the left side of the screen.
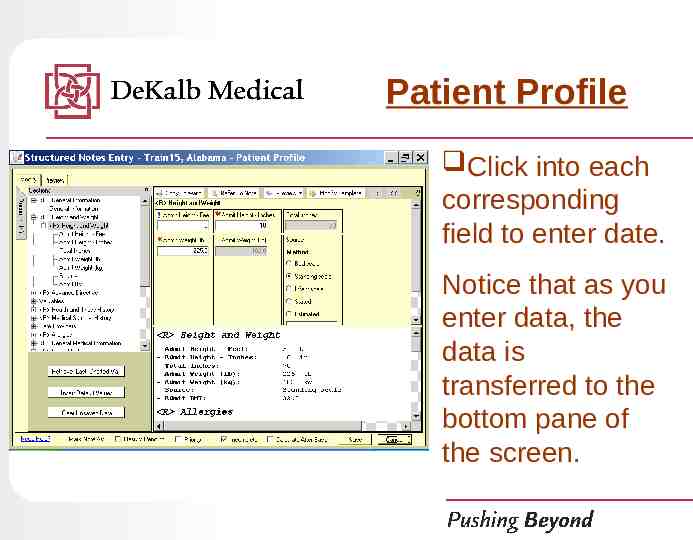
Patient Profile Click into each corresponding field to enter date. Notice that as you enter data, the data is transferred to the bottom pane of the screen.
Very Important! You have learned to start a new Patient Profile. However most of the time on the floor you will be opening up an existing Patient Profile document. To access existing documents, click the Document Tab. Then right click for more options.
ENTERING ALLERGIES The patient’s allergies must be entered by the Nurse during completion of the Patient Profile and can be updated at any time in the Acute Care System.
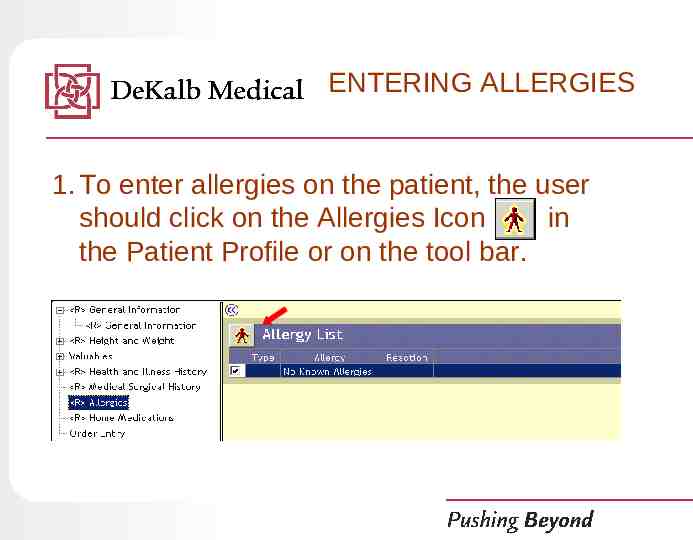
ENTERING ALLERGIES 1. To enter allergies on the patient, the user should click on the Allergies Icon in the Patient Profile or on the tool bar.
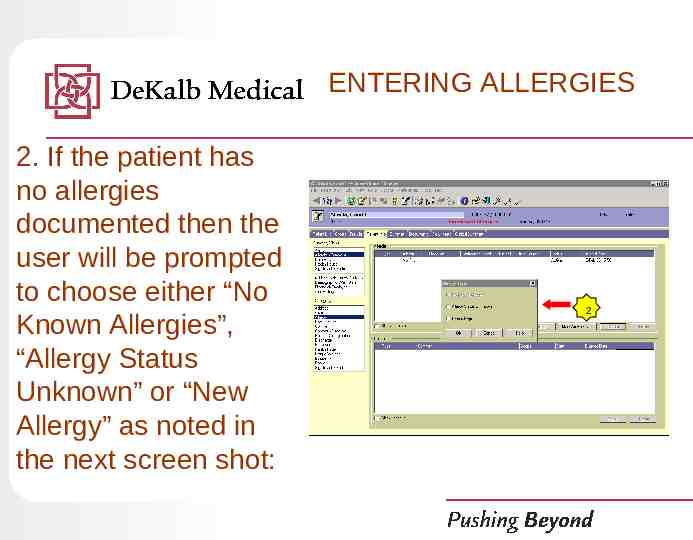
ENTERING ALLERGIES 2. If the patient has no allergies documented then the user will be prompted to choose either “No Known Allergies”, “Allergy Status Unknown” or “New Allergy” as noted in the next screen shot: 2
ENTERING ALLERGIES 3. Enter the Type of allergy (environment, drug, latex, other, etc.). 4. Identify the specific Allergen or select other and enter a note in the description explaining the allergy.
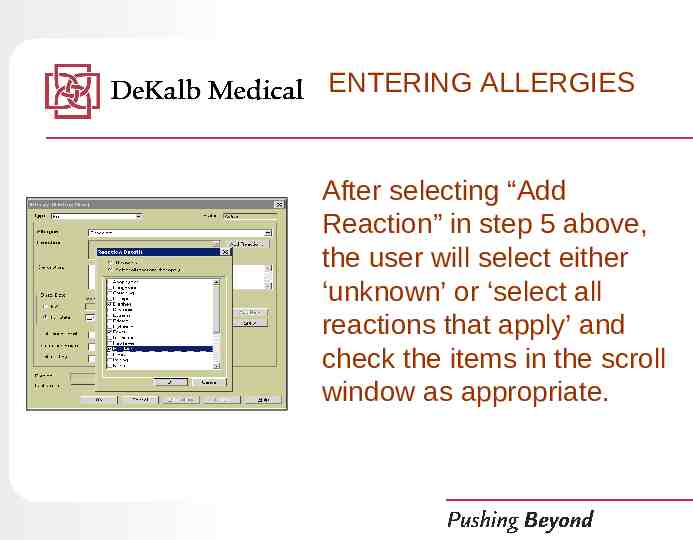
ENTERING ALLERGIES 3 4 5 5. Enter the Reaction if known by clicking Add Reaction (multiple reactions can be listed by selecting from the list). After selecting “Add Reaction” in step 5 above, the user will select either ‘unknown’ or ‘select all reactions that apply’ and check the items in the scroll window as appropriate.
ENTERING ALLERGIES After selecting “Add Reaction” in step 5 above, the user will select either ‘unknown’ or ‘select all reactions that apply’ and check the items in the scroll window as appropriate.
ENTERING ALLERGIES To complete ‘adding allergies’ simply click OK to close the Reaction Details window and click OK again on the Allergy window. Note: Allergies can be viewed / entered directly from the main screen by selecting the Allergy icon from the toolbar.
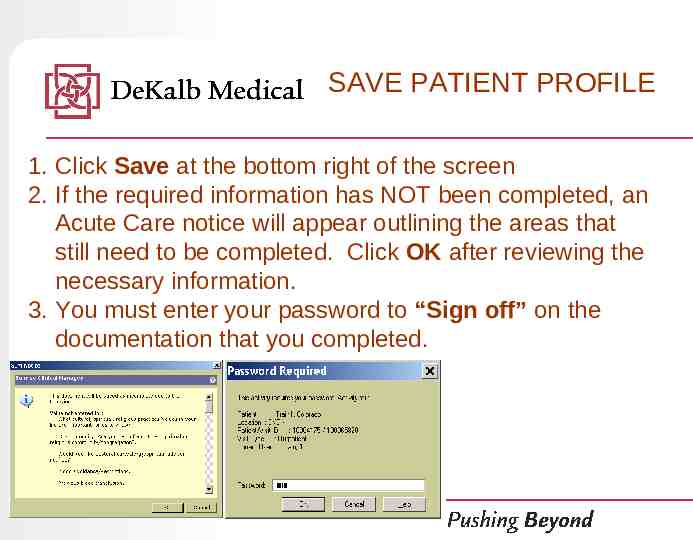
SAVE PATIENT PROFILE 1. Click Save at the bottom right of the screen 2. If the required information has NOT been completed, an Acute Care notice will appear outlining the areas that still need to be completed. Click OK after reviewing the necessary information. 3. You must enter your password to “Sign off” on the documentation that you completed.
You have just completed the Sunrise Acute Care training module. Please contact your coordinator if have not already done so to complete your assessment.
Summary In this class you have been instructed on how to: Login into Acute Care Navigate using general concepts and terms Understand the concept of electronic signature Locate the electronic chart Interpret the columns & flags on the patient list screen Review Results Review Orders Enter Patient Admission Information (Patient Profile) Enter and review Flowsheet information
Thank you for choosing DeKalb Medical We appreciate your service to our patients, family members and staff.