RapidFinder Analysis Software How-To Guide Initial Setup Proprietary
9 Slides720.08 KB
RapidFinder Analysis Software How-To Guide Initial Setup Proprietary & Confidential The world leader in serving science

Initial Setup after Software Installation There are two important steps in configuring RapidFinder Analysis Software v1.0 after it has been installed for the first time: Importing assay kit files: This process creates a library of Assays that can be used to setup and run experiments. Connecting to QuantStudio 5 instrument(s): This process creates a virtual (over the network) or direct cable connection to QuantStudio 5 instruments. 2 Proprietary & Confidential
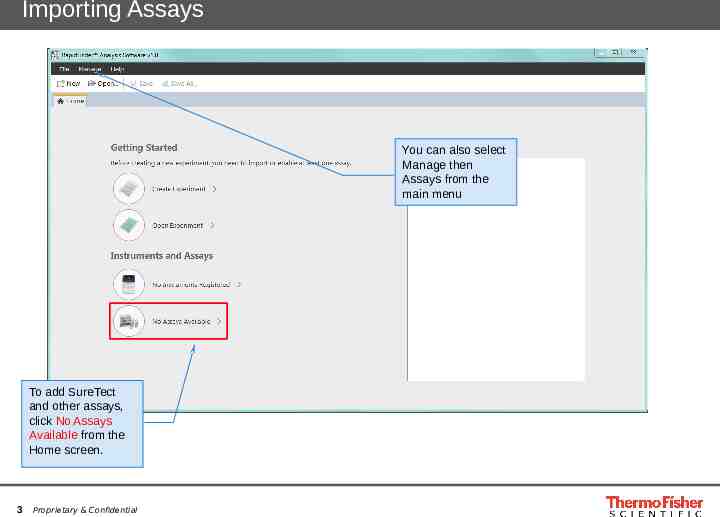
Importing Assays You can also select Manage then Assays from the main menu To add SureTect and other assays, click No Assays Available from the Home screen. 3 Proprietary & Confidential
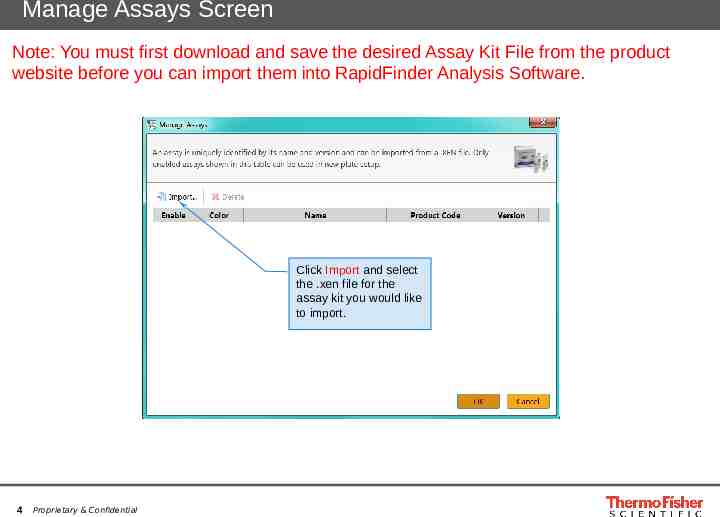
Manage Assays Screen Note: You must first download and save the desired Assay Kit File from the product website before you can import them into RapidFinder Analysis Software. Click Import and select the .xen file for the assay kit you would like to import. 4 Proprietary & Confidential
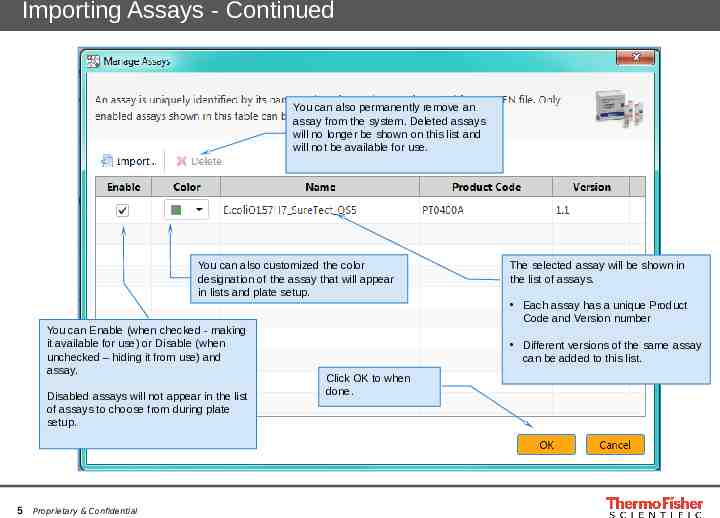
Importing Assays - Continued You can also permanently remove an assay from the system. Deleted assays will no longer be shown on this list and will not be available for use. You can also customized the color designation of the assay that will appear in lists and plate setup. You can Enable (when checked - making it available for use) or Disable (when unchecked – hiding it from use) and assay. Disabled assays will not appear in the list of assays to choose from during plate setup. 5 Proprietary & Confidential The selected assay will be shown in the list of assays. Each assay has a unique Product Code and Version number Different versions of the same assay can be added to this list. Click OK to when done.
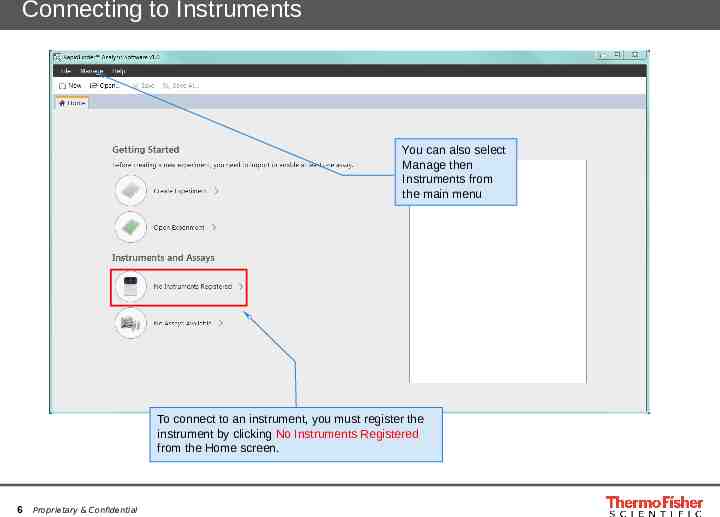
Connecting to Instruments You can also select Manage then Instruments from the main menu To connect to an instrument, you must register the instrument by clicking No Instruments Registered from the Home screen. 6 Proprietary & Confidential
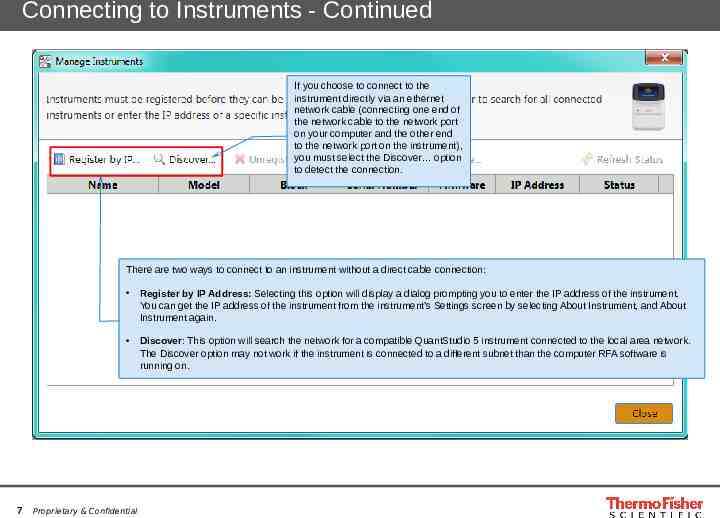
Connecting to Instruments - Continued If you choose to connect to the instrument directly via an ethernet network cable (connecting one end of the network cable to the network port on your computer and the other end to the network port on the instrument), you must select the Discover option to detect the connection. There are two ways to connect to an instrument without a direct cable connection: Register by IP Address: Selecting this option will display a dialog prompting you to enter the IP address of the instrument. You can get the IP address of the instrument from the instrument’s Settings screen by selecting About Instrument, and About Instrument again. Discover: This option will search the network for a compatible QuantStudio 5 instrument connected to the local area network. The Discover option may not work if the instrument is connected to a different subnet than the computer RFA software is running on. 7 Proprietary & Confidential
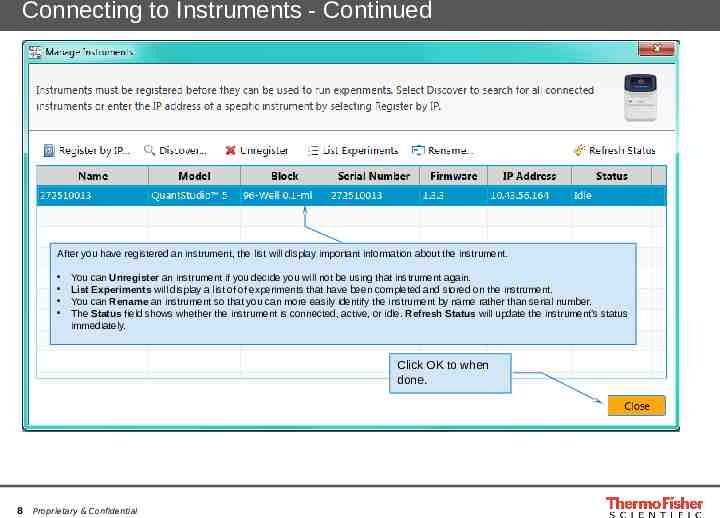
Connecting to Instruments - Continued After you have registered an instrument, the list will display important information about the instrument. You can Unregister an instrument if you decide you will not be using that instrument again. List Experiments will display a list of of experiments that have been completed and stored on the instrument. You can Rename an instrument so that you can more easily identify the instrument by name rather than serial number. The Status field shows whether the instrument is connected, active, or idle. Refresh Status will update the instrument’s status immediately. Click OK to when done. 8 Proprietary & Confidential
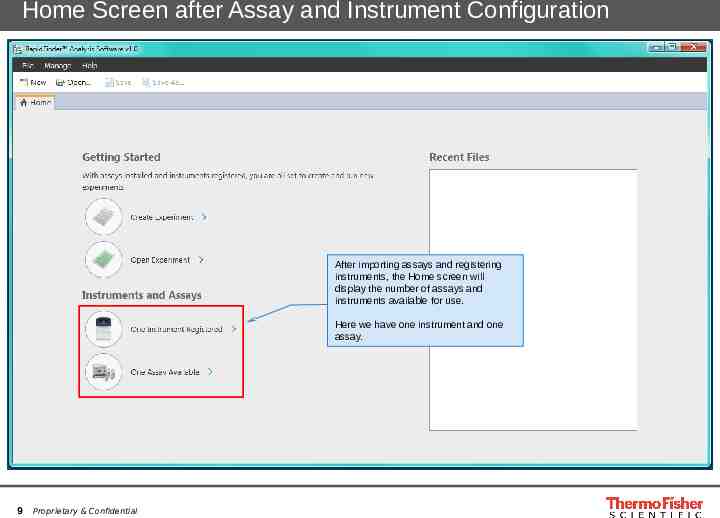
Home Screen after Assay and Instrument Configuration After importing assays and registering instruments, the Home screen will display the number of assays and instruments available for use. Here we have one instrument and one assay. 9 Proprietary & Confidential


