Printing Using UPrint Enabled Labs Updated 8/26/2011

9 Slides909.00 KB
Printing Using UPrint Enabled Labs Updated 8/26/2011
Before You Print: In order to release a job at a UPrint enabled lab, you will require one of the following: 1.A UCard or any older version issued by the “UCard, Access and Parking Services” (UCAPS) office 2.A UPrint card which can be purchased at Lydon or O’Leary for 1.00 (coming soon) Conway Cards will not work with UPrint.
Adding Value to Your Ucard *UPrint is Currently Free* Print Allotment: – Each employee and student is provided 15.00 of free printing per semester Additional Funds: – Additional funds may be loaded to your UCash account You must first enable it by visiting www.uml.edu/ActivateUCard Instructions on adding funds can be found by visiting www.uml.edu/AddUCash – UCash can be loaded with a checking account (no cost) or credit card ( 2.50 per load)
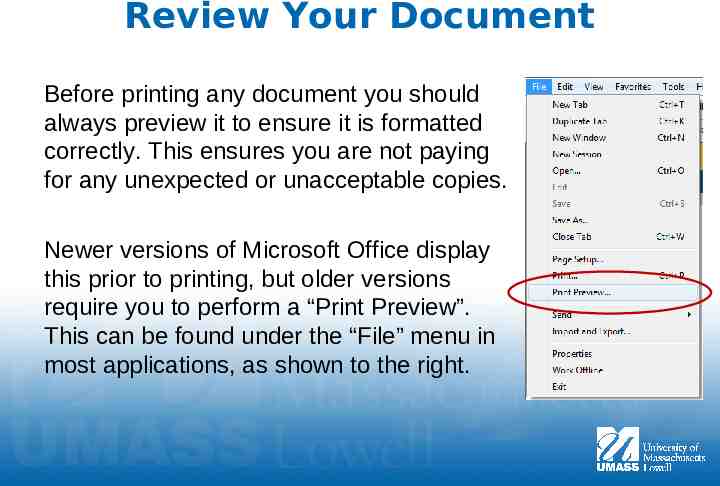
Review Your Document Before printing any document you should always preview it to ensure it is formatted correctly. This ensures you are not paying for any unexpected or unacceptable copies. Newer versions of Microsoft Office display this prior to printing, but older versions require you to perform a “Print Preview”. This can be found under the “File” menu in most applications, as shown to the right.
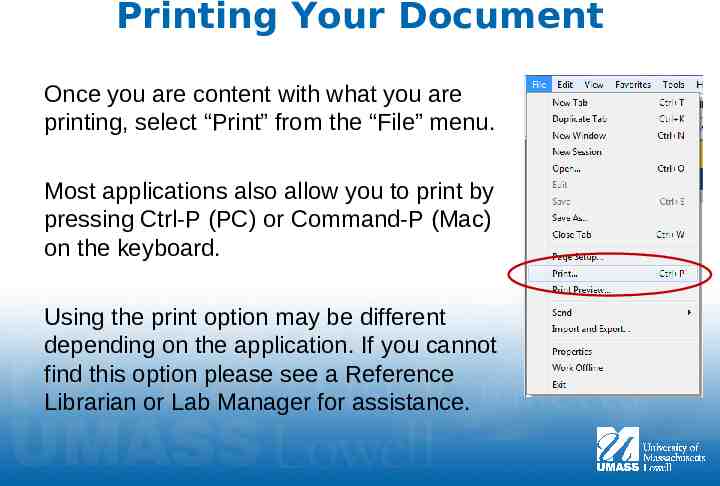
Printing Your Document Once you are content with what you are printing, select “Print” from the “File” menu. Most applications also allow you to print by pressing Ctrl-P (PC) or Command-P (Mac) on the keyboard. Using the print option may be different depending on the application. If you cannot find this option please see a Reference Librarian or Lab Manager for assistance.
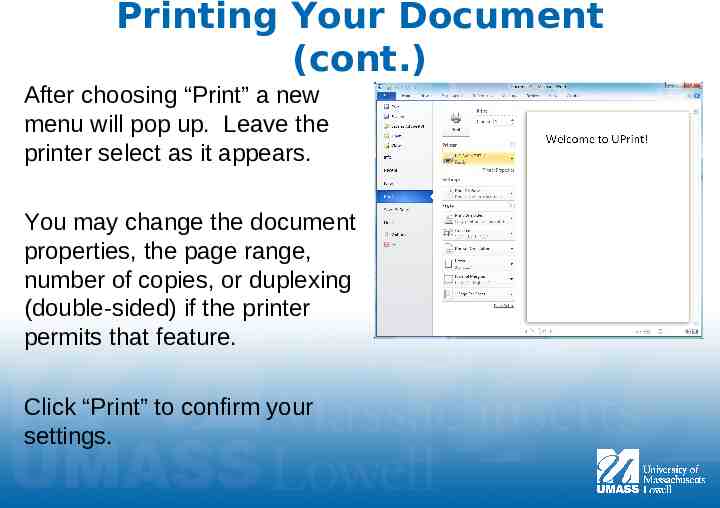
Printing Your Document (cont.) After choosing “Print” a new menu will pop up. Leave the printer select as it appears. You may change the document properties, the page range, number of copies, or duplexing (double-sided) if the printer permits that feature. Click “Print” to confirm your settings.
Printing Your Document (cont.) A “Print Job Details” dialog box will pop up. In the first box, enter your University/iSiS ID Number without “UMS” or the ID Number on your UPrint Card if you purchased one. The second field is a name for your print job, such as “first draft” so you know which job to release. Press the “Print” button when completed.
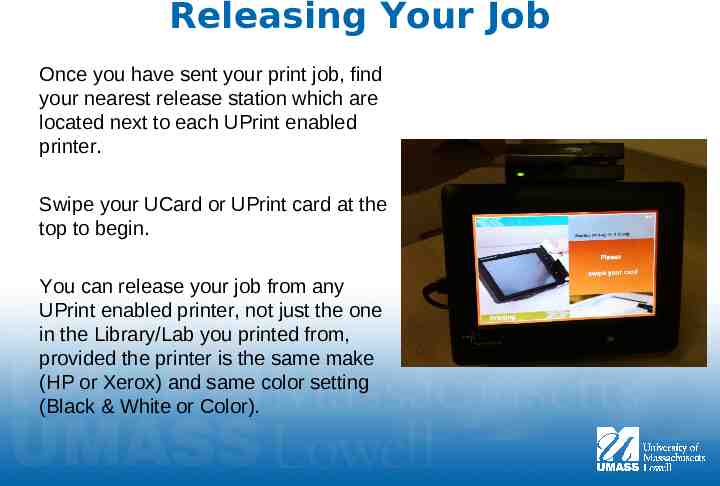
Releasing Your Job Once you have sent your print job, find your nearest release station which are located next to each UPrint enabled printer. Swipe your UCard or UPrint card at the top to begin. You can release your job from any UPrint enabled printer, not just the one in the Library/Lab you printed from, provided the printer is the same make (HP or Xerox) and same color setting (Black & White or Color).
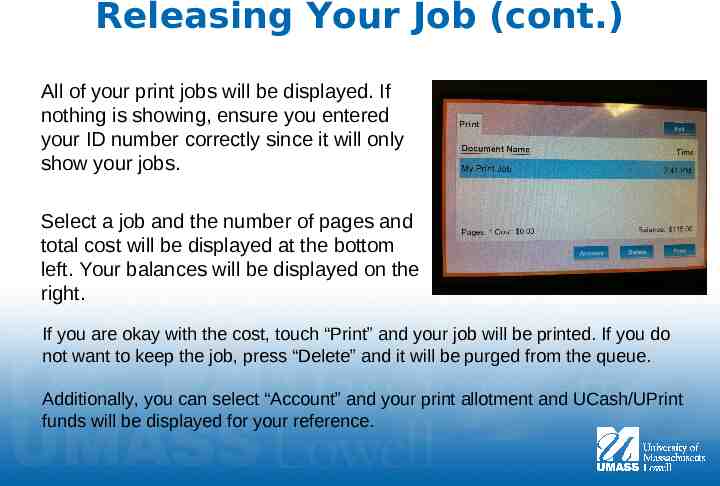
Releasing Your Job (cont.) All of your print jobs will be displayed. If nothing is showing, ensure you entered your ID number correctly since it will only show your jobs. Select a job and the number of pages and total cost will be displayed at the bottom left. Your balances will be displayed on the right. If you are okay with the cost, touch “Print” and your job will be printed. If you do not want to keep the job, press “Delete” and it will be purged from the queue. Additionally, you can select “Account” and your print allotment and UCash/UPrint funds will be displayed for your reference.